SUMMARY
Learn how to manage and view checklists and tasks on transactions.
Introduction
Checklists help admins and agents stay in compliance by tracking tasks that need to be completed on a transaction. Tasks are items on a checklist that represent documents or actions that need to be uploaded or completed.
Checklist Templates are set up by an admin for use across the company’s transactions. Once a Checklist Template is set up, it can be added to transactions manually or, preferably, automatically based on rules defined by an admin.
Once a checklist has been added to a transaction, it can be refined and altered to be specific to the transaction it was added to (and will not impact the template it was based on).
Agents and admins may check off tasks on transactions to track and communicate the status of each task. Tasks can only be checked as fully completed by admins, while agents can mark tasks as done (Agent-checked) or not applicable (N/A) to indicate they're ready for an admin's review.
Here is an example of a typical task office's task workflow:
● An agent marks a task as either done  (Agent-checked) or Not Applicable
  (N/A).
● An admin filters for Agent-Checked tasks on the Tasks page to review tasks marked as done or not applicable.
● From the Tasks Page or while viewing a transaction, an admin checks a task to mark it as completed  or un-marks the agent's check if they feel the task hasn't been fulfilled.
Once an admin checks a task, the task is considered fully complete and will update the transaction's Checklist Completion Status.
Manage Transaction Checklists
Add a Checklist 🎥
Who can do this? Agents and admins with permission to Assign checklist templates to transactions.
When a checklist isn’t auto-assigned to a transaction, it can be added manually.
3:18
To manually add a checklist to a transaction:
- From the transaction's Checklists area, click [➕].
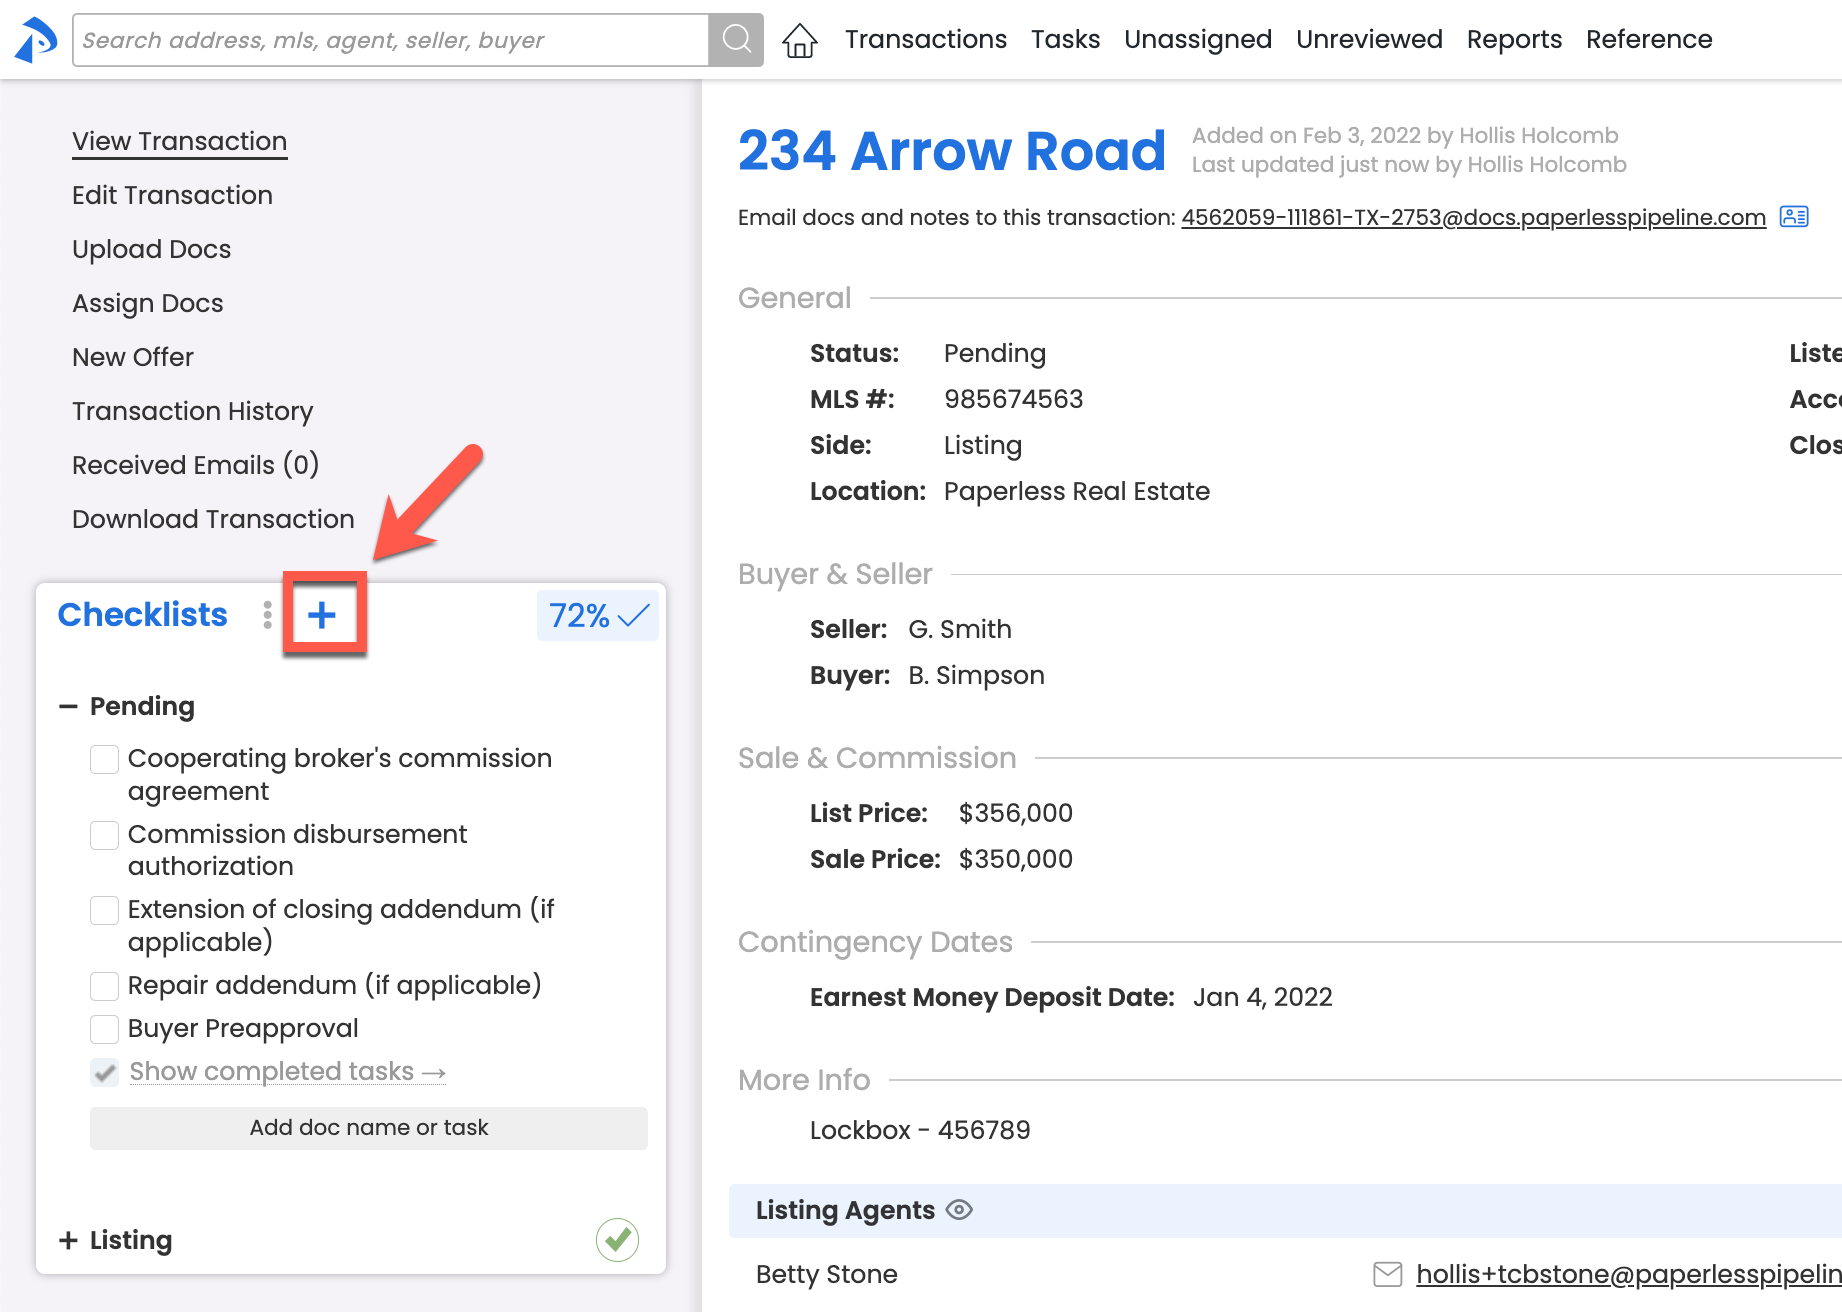
- Select the desired checklist from the dropdown list. Your selected checklist will be added to the transaction.

The best way for checklists to be added to transactions is for an admin to set the Checklist Template to be automatically added based on a transaction's Status, Label, and/or Side. Learn how to Automatically Assign Checklist Templates to Transactions →
Edit a Checklist Title
Who can do this? Admins with permission to Fully manage checklists and templates.
To edit the title of a checklist:
- From the transaction's Checklists area, hover over the checklist and click the [pencil].
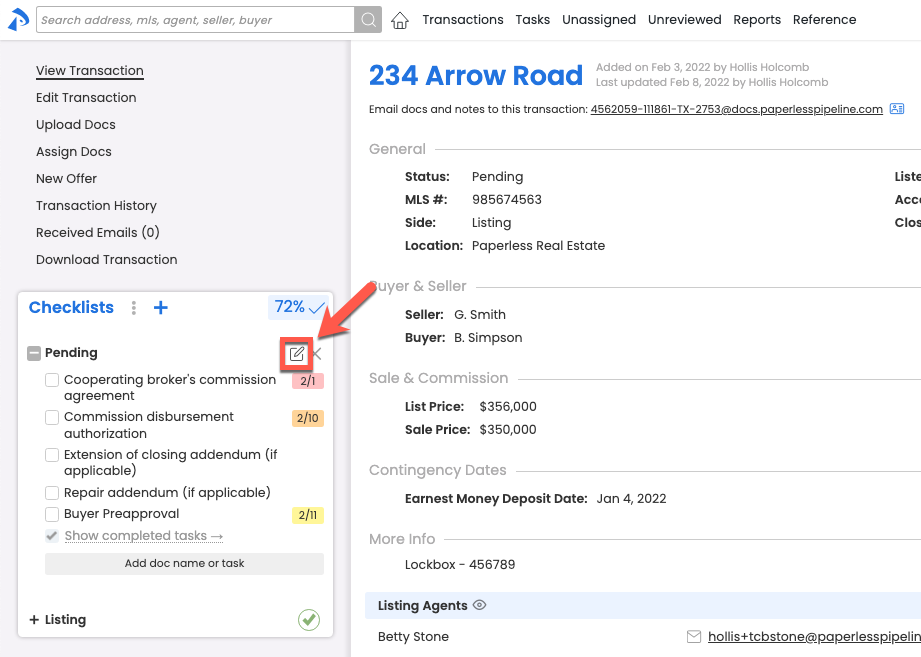
- Update the Checklist Title.
- Click [Save] to update the title.

Reorder Checklists
Who can do this? Admins with permission to Fully manage checklists and templates.
To reorder checklists on a transaction:
- From the transaction's Checklists area, click and hold the Title of a checklist, then drag it to your desired position in the Checklists area.
Delete a Checklist
Who can do this? Admins with permission to Fully manage checklists and templates.
To delete a checklist on a transaction:
- From the transaction's Checklists area, hover over the checklist and click the [❌] that appears to the right.
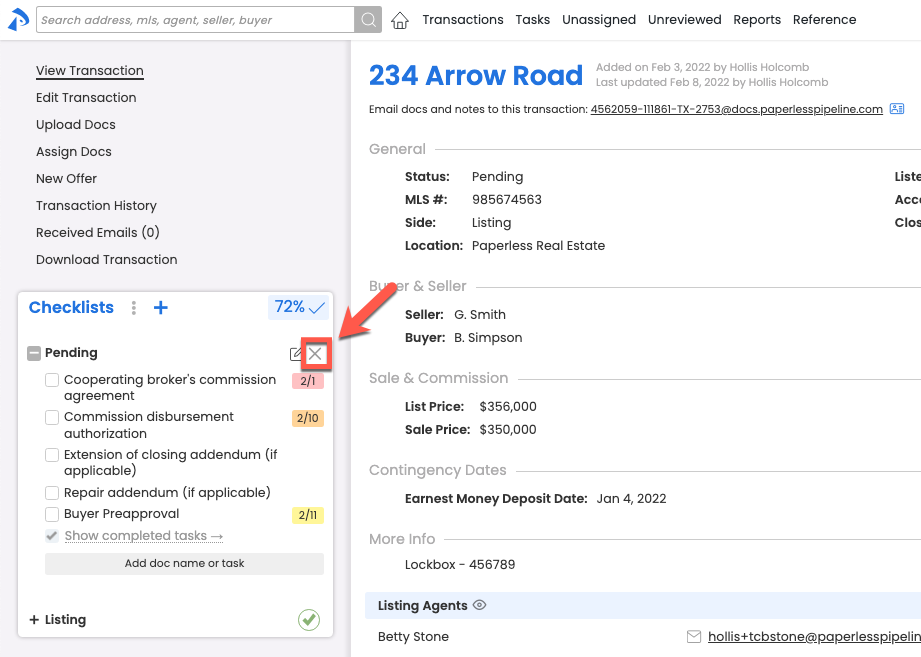
- Click [delete] to confirm. The checklist will be deleted from the transaction.

Manage Transaction Tasks
Add a Task
Who can do this? Admins with permission to Fully manage checklists and templates.
To add a new task to a checklist:
- From the bottom of your desired checklist in the transaction's Checklists area, click [Add Doc Name or Task].
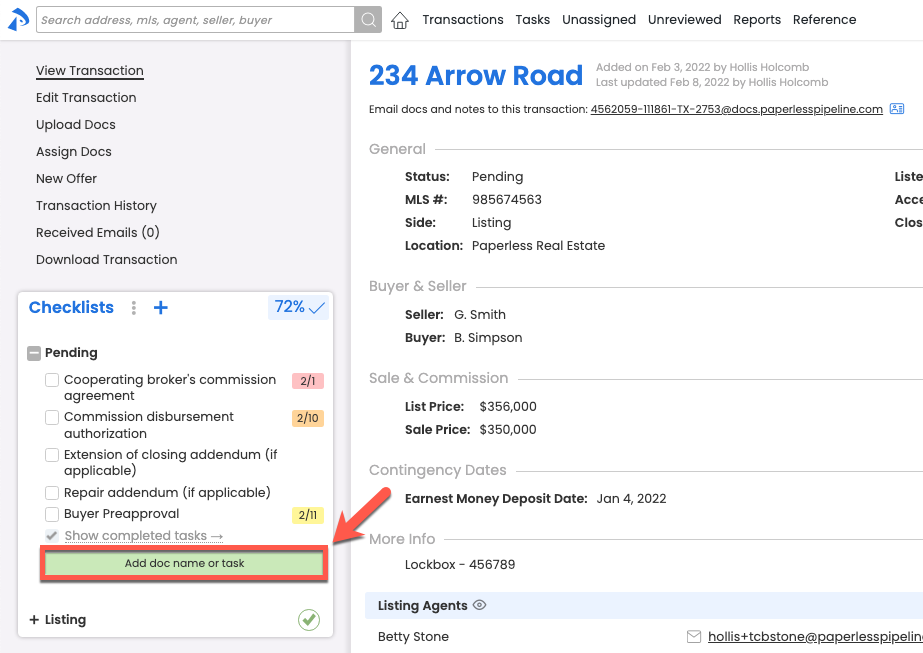
- Type the Task Name.
- Click [Save] to add the new task.

Edit a Task's Name
Who can do this? Admins with permission to Fully manage checklists and templates.
To edit the name of a task:
- From the transaction's Checklists area, hover over your desired task, and click the [pencil].
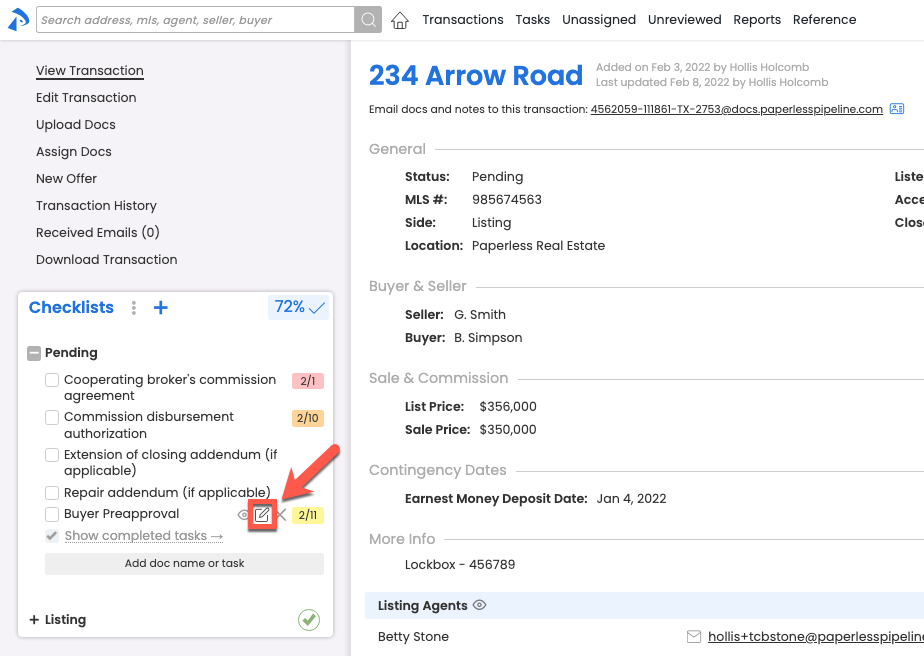
- Type the updated Task Name.
- Click [Save] to update the task.

Edit a Task's Visibility
Who can do this? Admins with permission to Fully manage checklists and templates.
To change who will have access to view and receive reminders about a task:
- From the transaction's Checklists area, hover over the task and click the [eye].
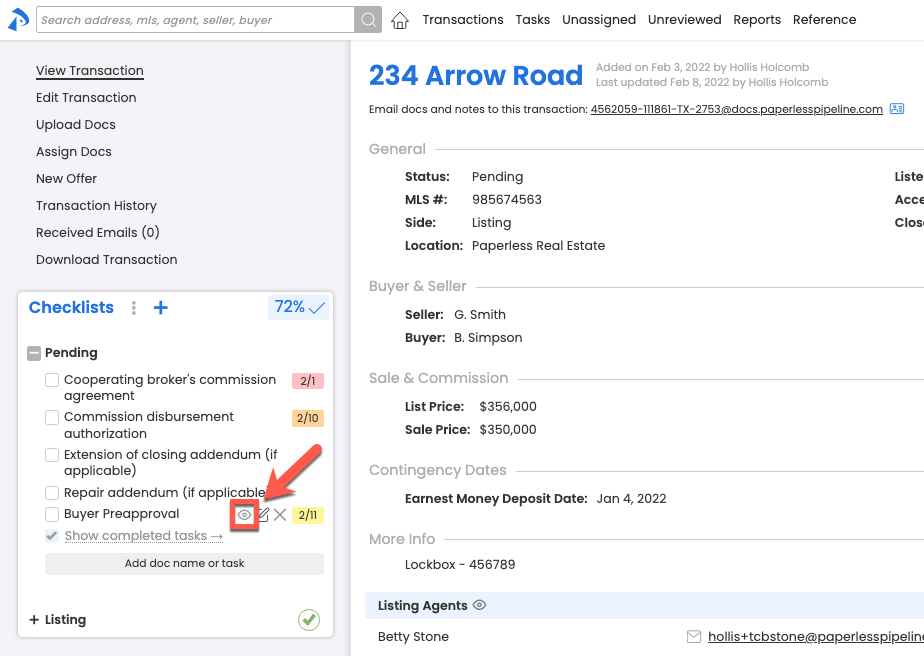
- Select the appropriate Task Visibility option. Learn more about Visibility Types →
- Click [Set Task Visibility]. Now, only those that have access to the Visibility Type you selected will be able to view the task.

The best way to set Task Visibility for a task is to set it on the Checklist Template. That way, every time the template is used to add a checklist to a transaction, its tasks will already have their visibility set. Learn how to Set Task Visibility on Checklist Templates →
Edit a Task's Due Date
Who can do this?
● Admins with permission to Fully manage checklists and templates.
● Agents can edit the due date of tasks set to Allow Agents to Change a Task's Due Date.
Due dates can be added to tasks as an Absolute Due Date - like Tuesday April 12th - or a Relative Due Date, which is a due date relative to certain trigger activities.
To set a task's due date:
- From the transaction's Checklists area, click the task's due date. Or, if a date hasn't been assigned to the task, hover over the task and click the [calendar].
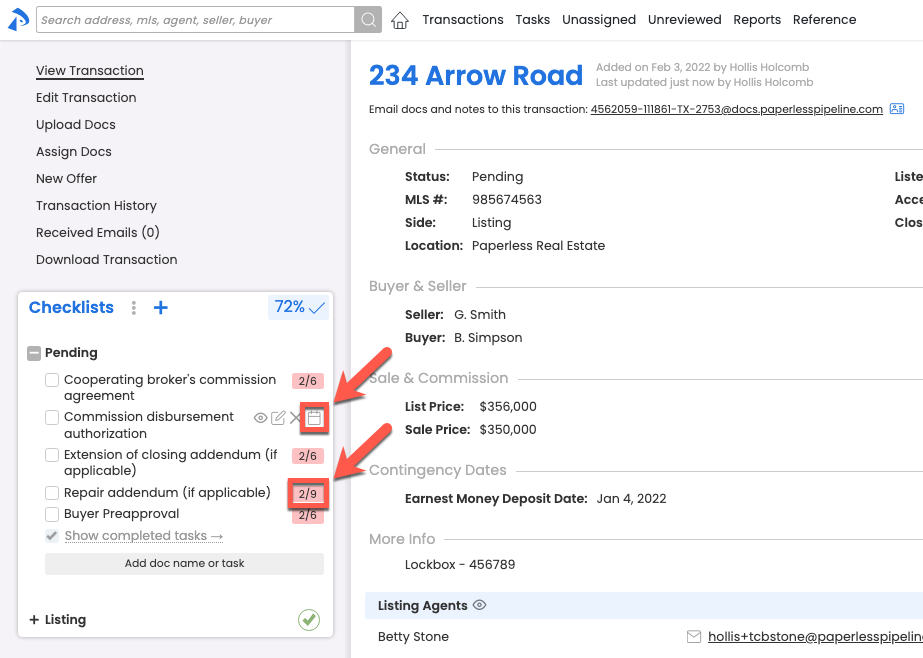
- From the pop-up, you can either assign a specific Absolute Date or a Relative Due Date:
• To assign a specific date, select [Absolute Date], then select a date.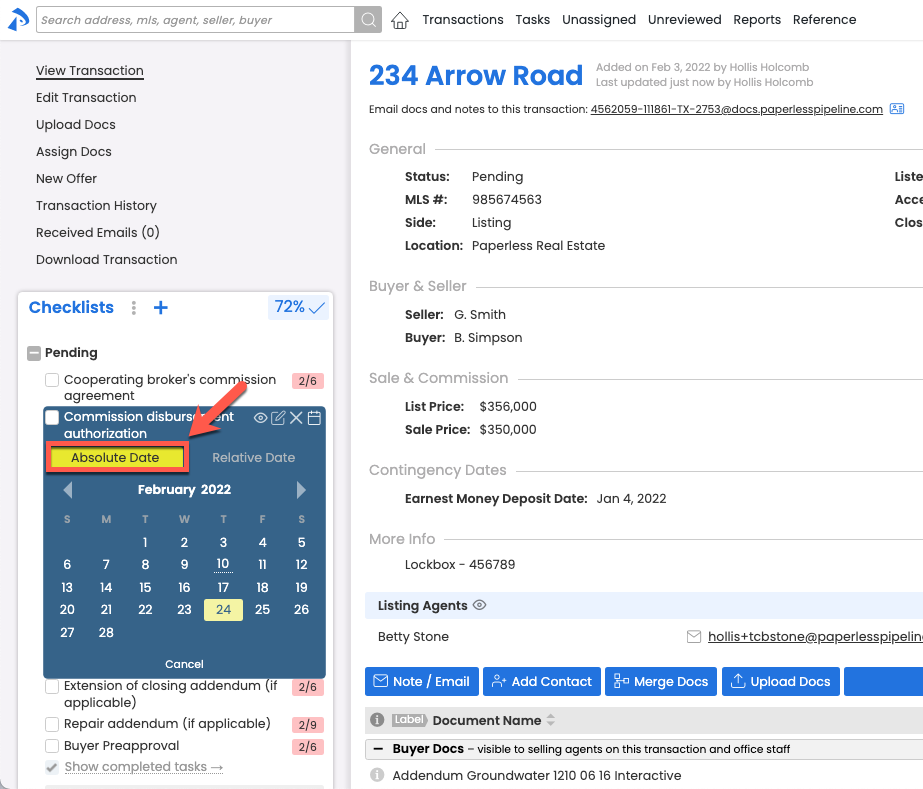
• Or, to assign a Relative Due Date date based on important dates related to the transaction, select [Relative Date], set your date rule, then [Set Date Rule]. Learn more about Relative Due Dates →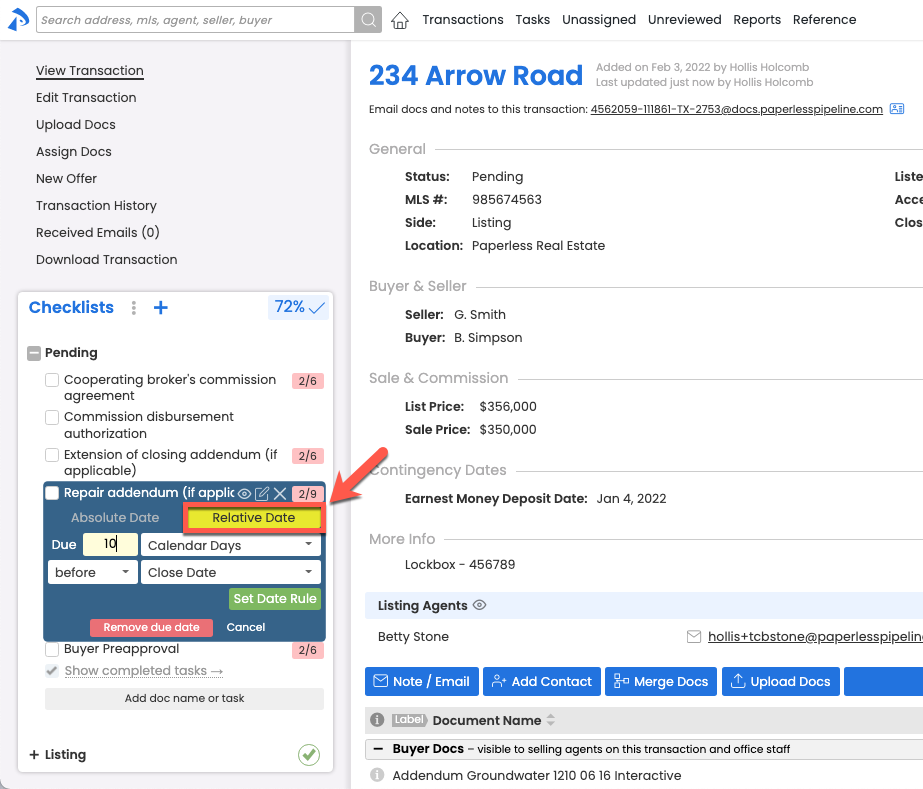


The best way for due dates to be added to tasks is to set the task's Relative Due Dates on the Checklist Template. When a Checklist Template is set up with Relative Due Dates then added to a transaction, its tasks will already have their due dates set. Learn how to Add Relative Due Dates on Checklist Templates →
Reorder Tasks
Who can do this? Admins with permission to Fully manage checklists and templates.
To reorder tasks on a transaction:
- From the transaction's Checklists area, click and hold the Name of a task, then drag it to your desired position within the checklist.

Delete a Task
Who can do this? Admins with permission to Fully manage checklists and templates.
To delete a task from a transaction:
- From the transaction's Checklists area, hover over the task and click the [❌] that appears to the right.
- Click [Delete] to confirm.

Manage Your Checklist View
Who can do this? Anyone with access to view a transaction will see any tasks set to a Visibility Type they have access to view.
On any transaction, view tasks assigned to the transaction from the Checklists area in the left menu. You will be able to view any task set to a Visibility Type you have access to view.
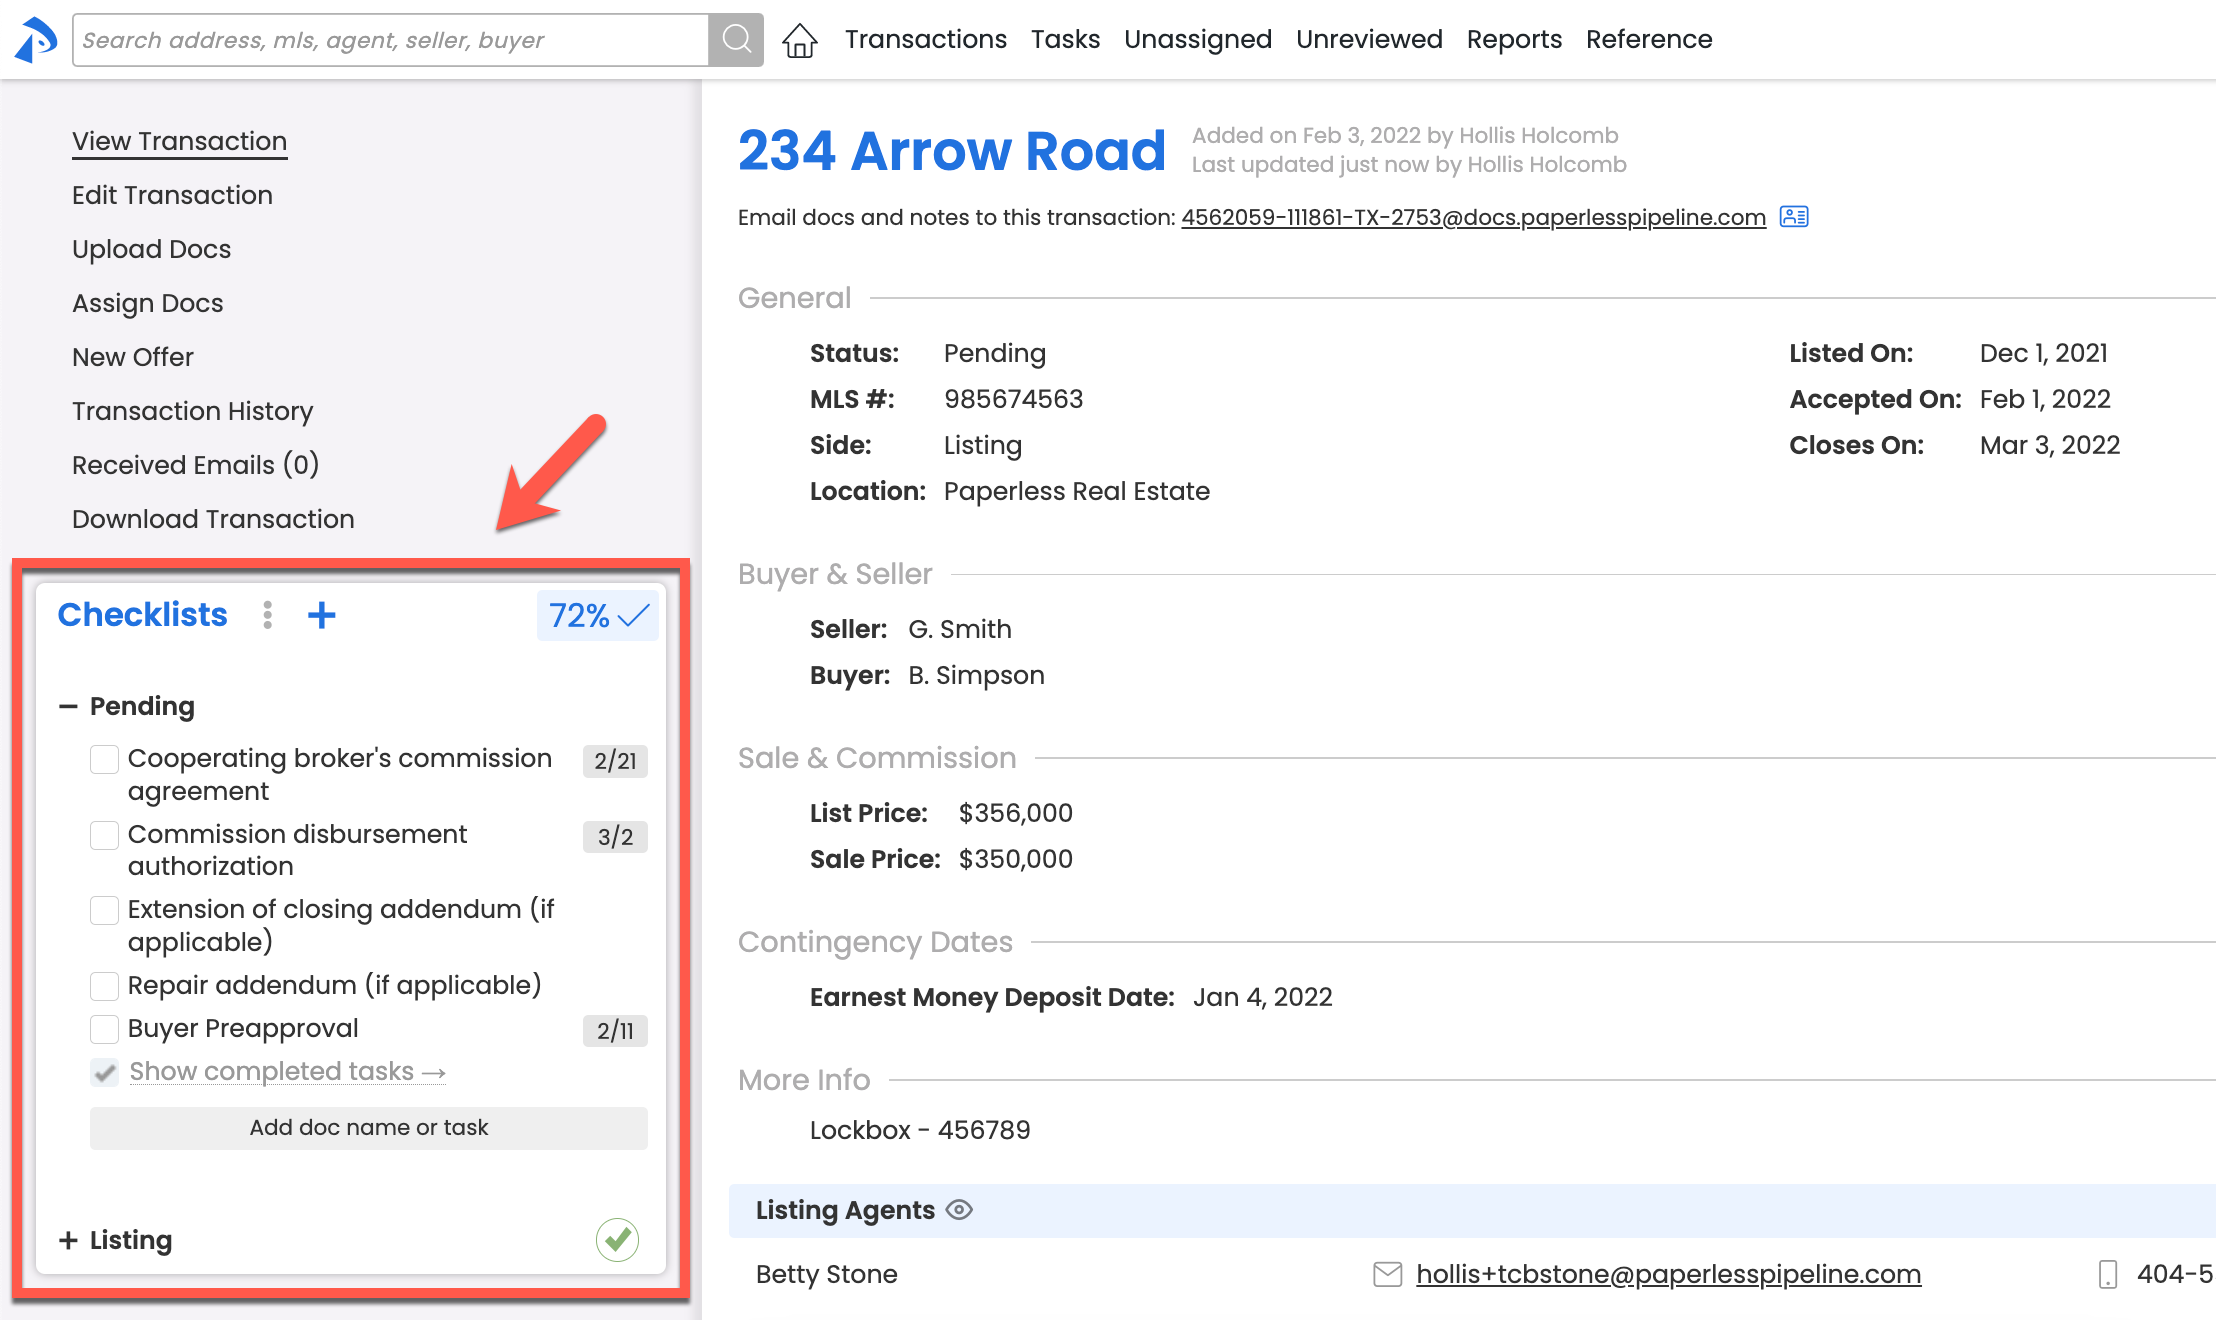
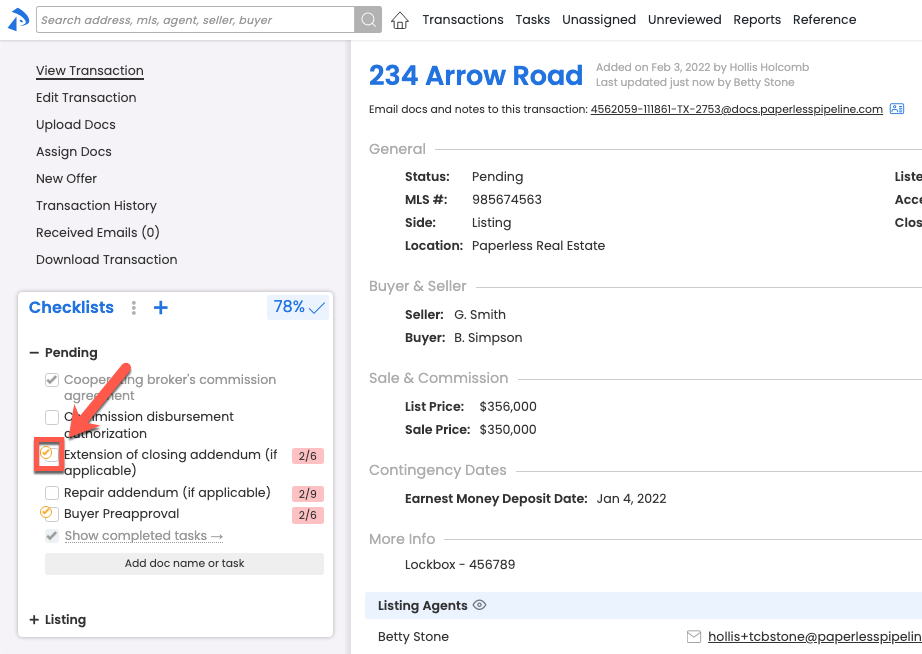
Show Completion Status as Percentage or Ratio
Use the Checklist Completion Status in the upper-right corner of the checklists area to quickly check the status of a transaction’s completed tasks (tasks completed by an admin).
Opt to show the Checklist Completion Status as a percentage or ratio.
To show the Completion Status as a percentage or ratio:
- From the top right corner of the transaction's Checklists area, click the Checklist Completion [Percentage ✔] or [Ratio ✔] to toggle between percentage and ratio.


Turn On Checklist Scrolling
Checklist Scrolling lets you choose what tasks and parts of the transaction you're viewing at any given time by allowing you to scroll through the checklists separately from the main transaction page.
Checklist Scrolling is useful for managing a long list of tasks, for dragging tasks to messages, and for using Smart Checklists to identify related docs and tasks.
To turn on Checklist Scrolling:
- From the top of the transaction's Checklists area, click [⋮].
- Check the box next to [Checklist scrolling].
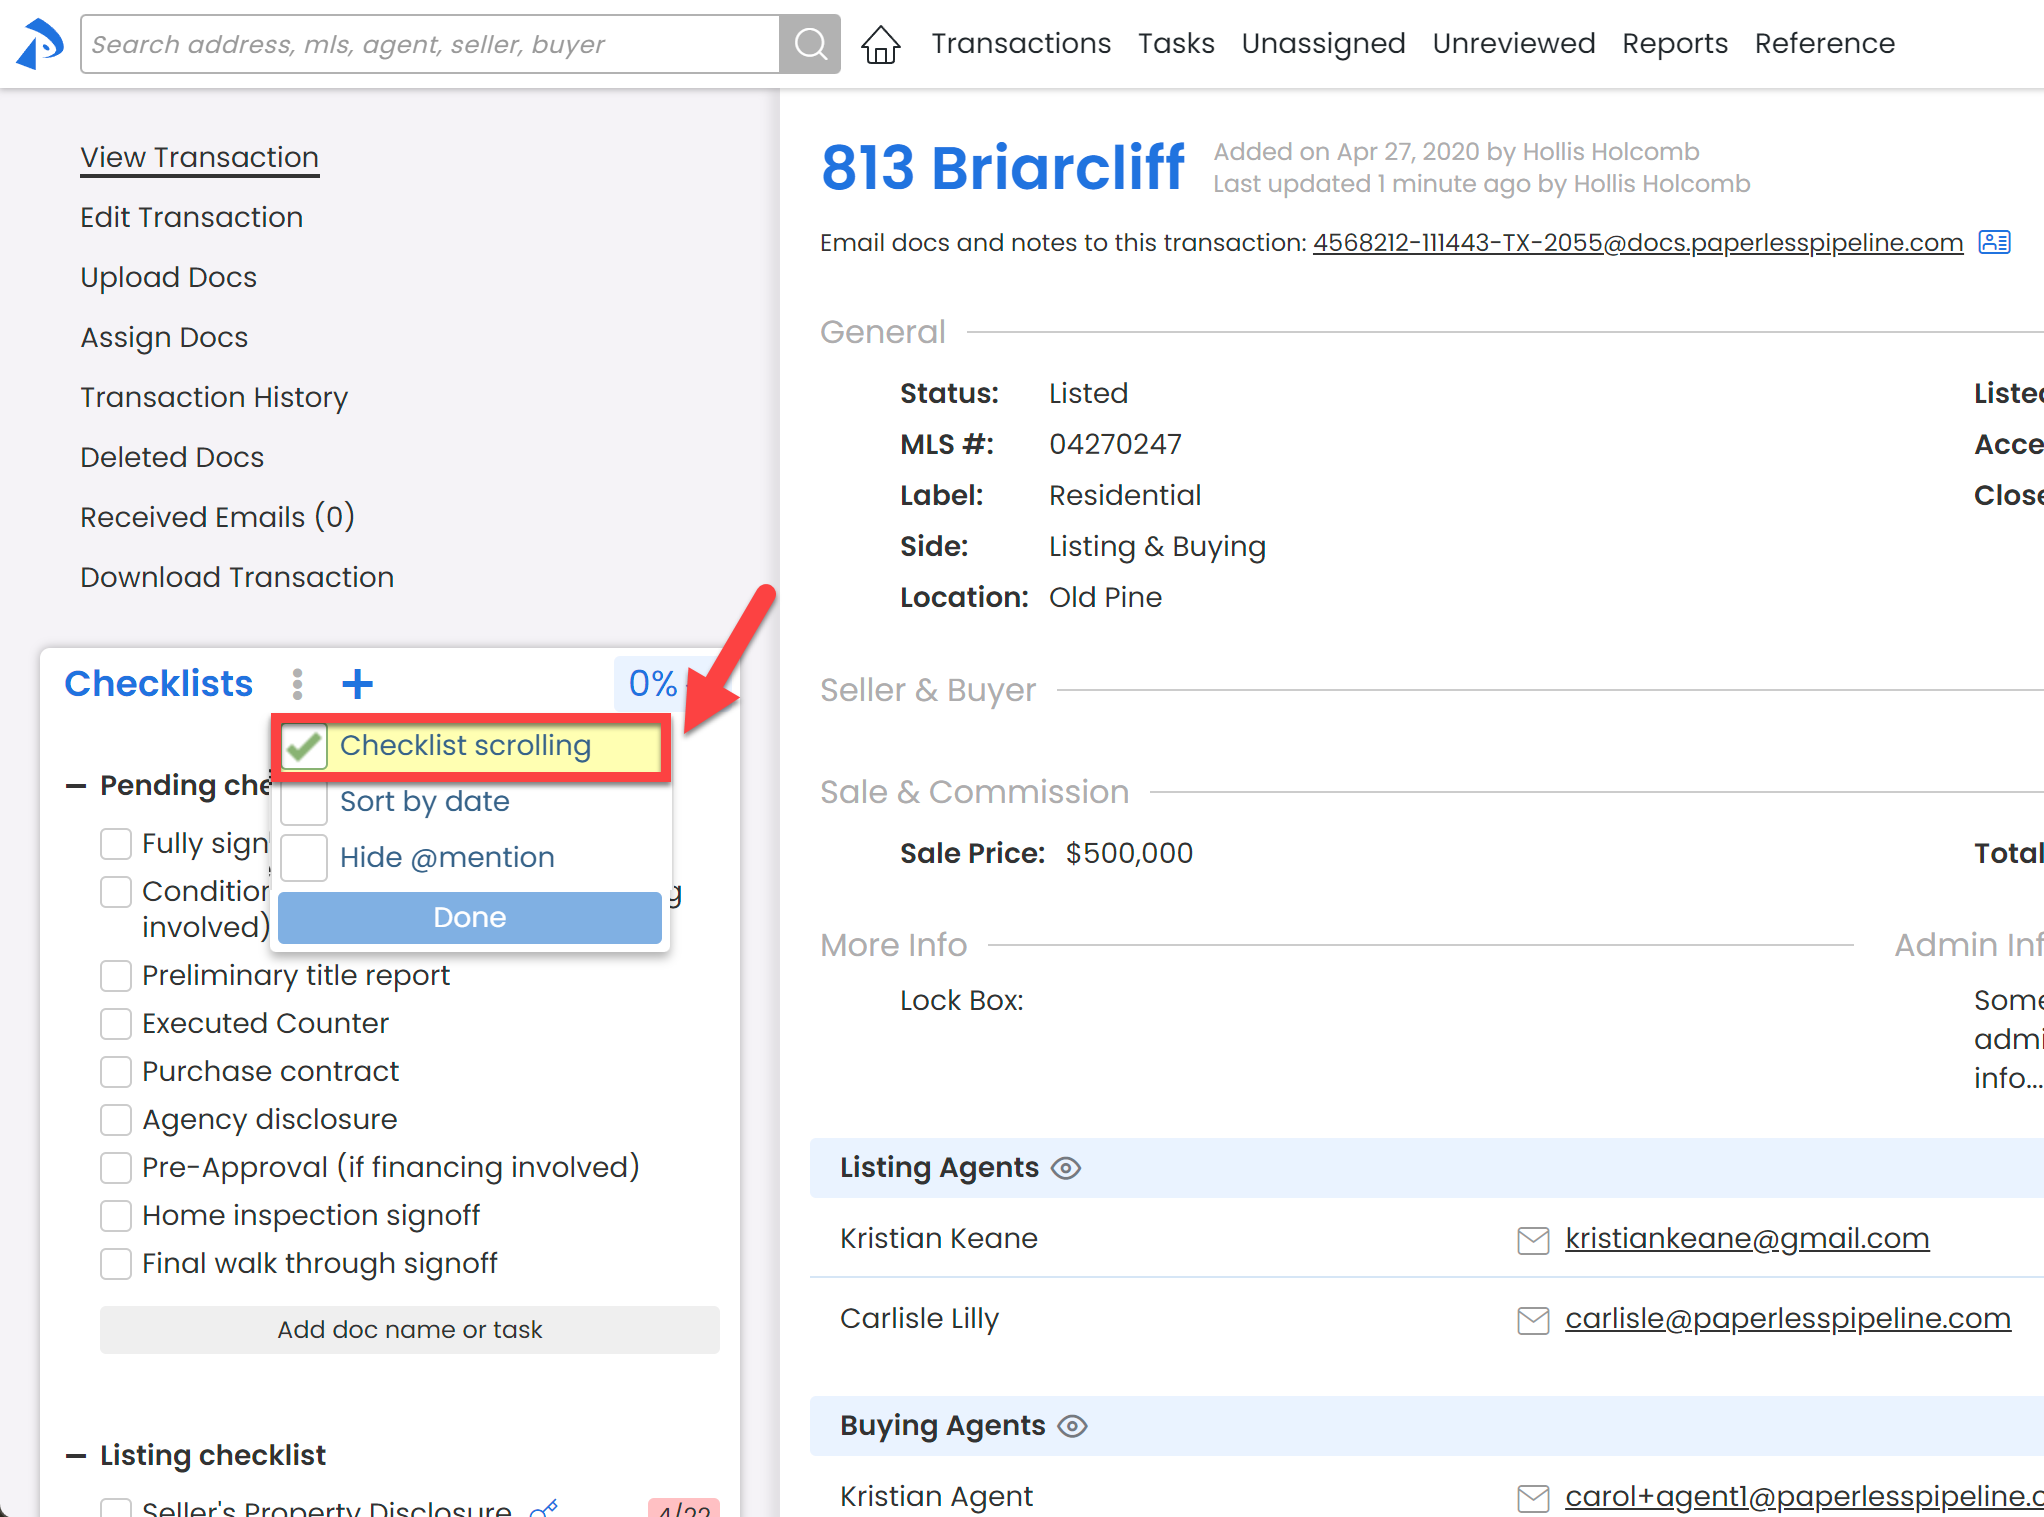
- Click [Done].

Sort Tasks by Due Date
By default, checklist tasks on transactions are shown in the original order set by an admin on the Checklist Template.
If you prefer, sort your view of tasks by due date instead.
To sort checklist tasks by due date:
- From the top of the transaction's Checklists area, click [⋮].
- Check the box next to [Sort by date].
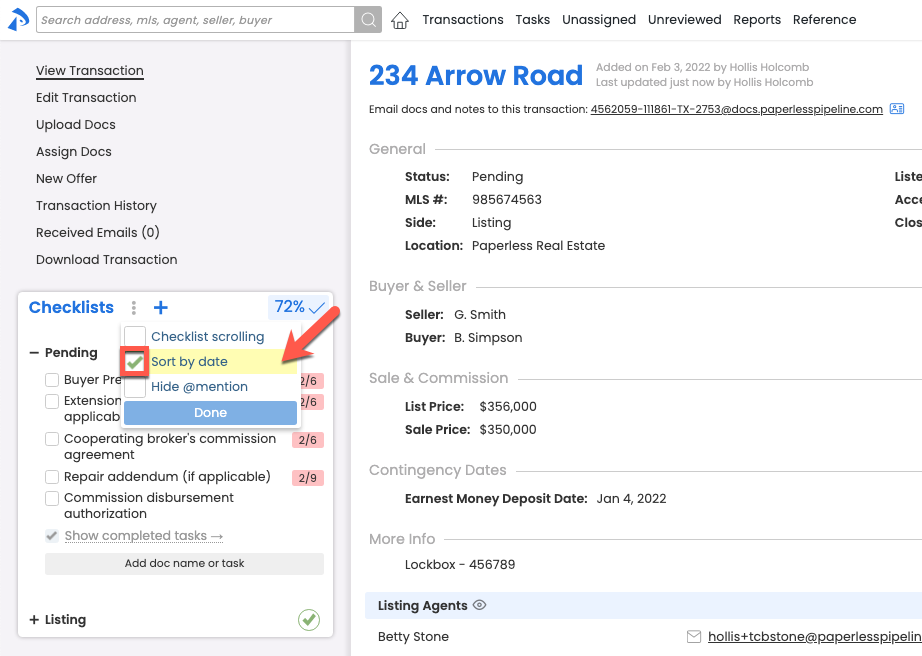
- Click [Done]. Tasks will appear in order by their due date.

Hide @mention
Make task names easier to read by hiding any @Mention text on checklists. Learn more about @Mention →
To hide @Mention text on tasks:
- From the top of the transaction's Checklists area, click [⋮].
- Check [Hide @mention].
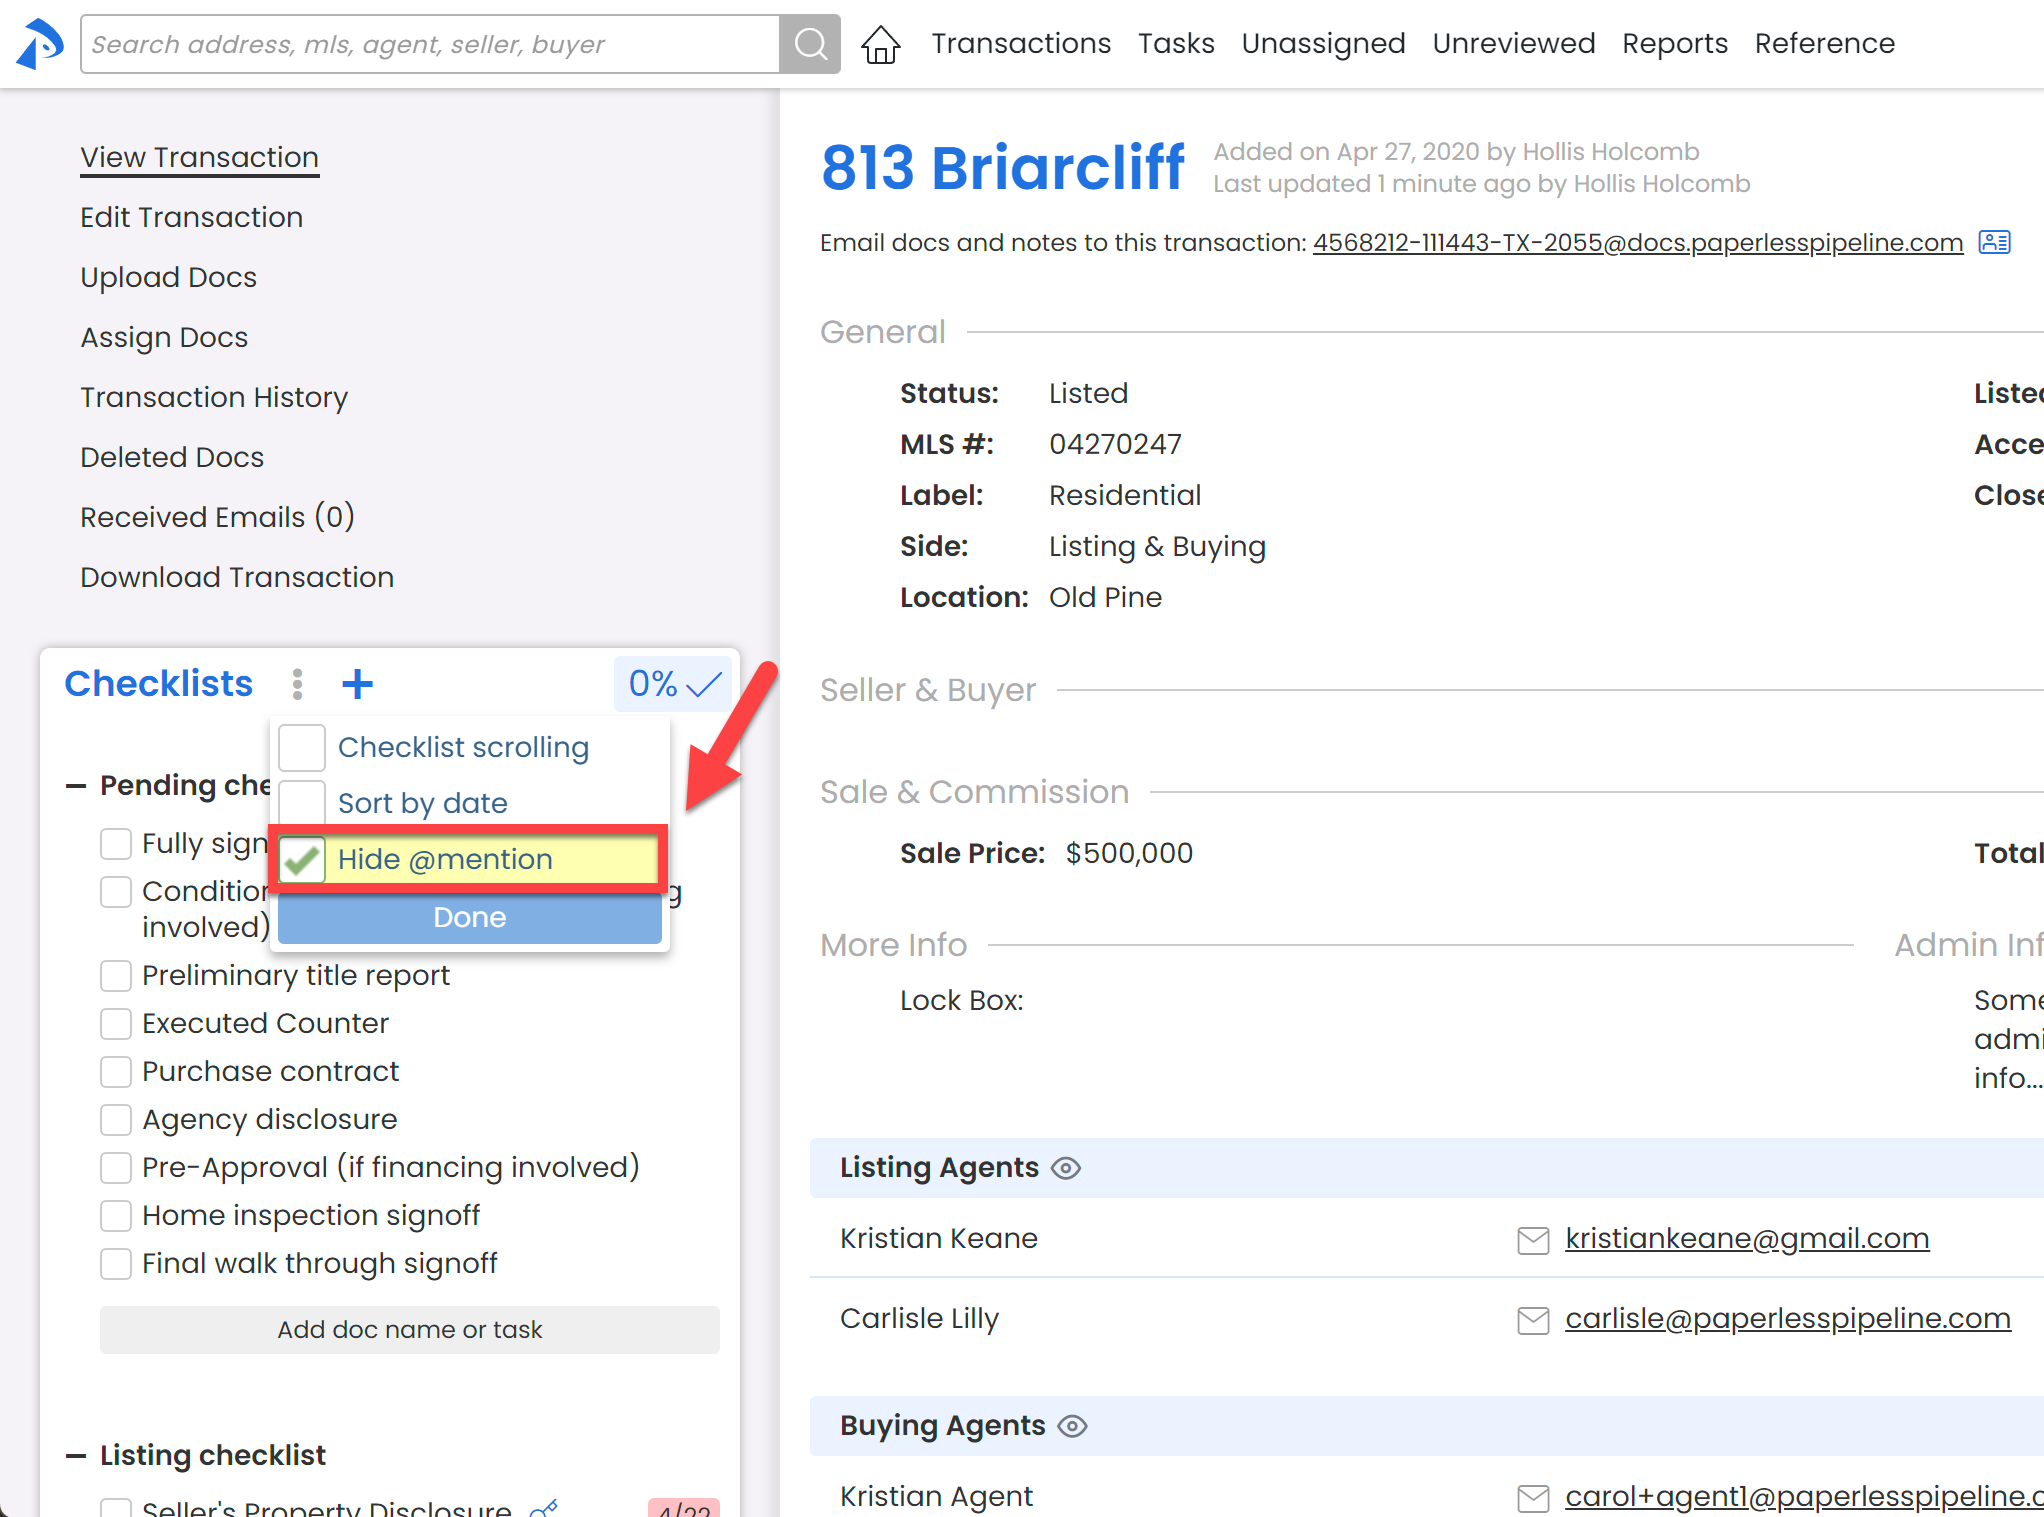
- Click [Done]. The @Mention text will be hidden from your view of checklists on all transactions.

Check Off Tasks on a Transaction
Agents and admins may check off tasks on transactions to track and communicate the status of each task. Tasks can only be checked as fully completed by admins, while agents can mark tasks as done (Agent-checked) or not applicable (N/A) to indicate they're ready for an admin's review.
Here is an example of a typical task office's task workflow:
● An agent marks a task as either done (Agent-checked) or Not Applicable (N/A).
● An admin filters for Agent-Checked tasks on the Tasks page to review tasks marked as done or not applicable.
● From the Tasks Page or while viewing a transaction, an admin checks a task to mark it as completed or un-marks the agent's check if they feel the task hasn't been fulfilled.
Once an admin checks a task, the task is considered fully complete and will update the transaction's Checklist Completion Status.
Agents
Agents check off tasks to communicate to admins when they've finished a task or when the task is not applicable on a transaction.
When an agent marks a task as done or not applicable, the task will no longer appear in the agent's Daily Task Reminder email or on their Tasks List. The tasks will continue to appear in those two areas for the admin.
Mark a Task as Done (Agent-checked)
Who can do this?
● Agents
● Admins without permission to Fully manage checklists and templates.
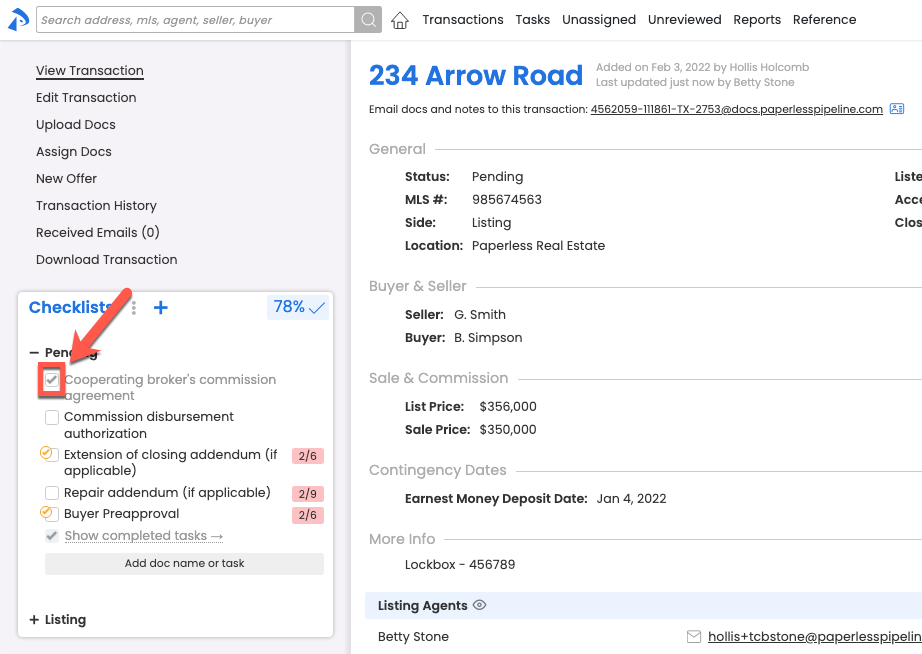
For agents to Agent-check a task:
- From the transaction's Checklists area, check the box to the left of the task. The task will be agent-checked.

Learn more about agent-checked tasks →
When reviewing tasks marked as done by agents, admins may:
- Check off the task to mark it as complete.
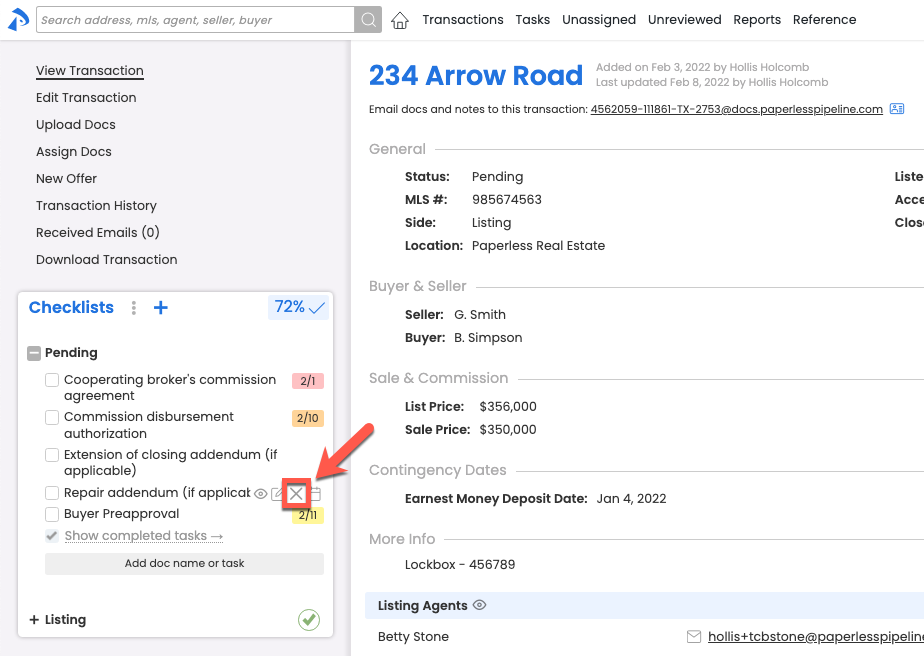
- Un-mark the task as Agent-checked by clicking the [❌] that appears when hovering over the task. If the un-marked task has a due date, it will start being included in the agent's Daily Task Reminders or on their Tasks List.
Set a Task as Not Applicable (N/A)
Who can do this?
● Agents
● Admins without permission to Fully manage checklists and templates.
For agents to mark a task as not applicable:
- From the transaction's Checklists area, hold the [Shift] key on your keyboard and click the box to the left of the task.
- When the agent task options appear, click [Not Applicable], then [Done]. The task will be set as not applicable.
When reviewing tasks set as not applicable by agents, admins may:
- Check the task to mark it as complete. Tasks marked as not applicable by agents will remain crossed out to indicate they were marked as N/A, even after fully checked.
- Delete the task to remove it from the transaction completely.
- Un-mark the task as N/A by clicking the [❌] that appears when hovering over the task. If the un-set task has a due date, it will start being included in the agent's Daily Task Reminders or on their Tasks List.
Admins
For a task to be considered fully complete, it must be checked as complete by an admin.
Once an admin checks a task, the task is considered fully complete and will update the Checklist Completion Status of the transaction.
Complete a Task
Who can do this? Admins with permission to Fully manage checklists and templates.
For admins to mark a task as fully complete:
- From the transaction's Checklists area, check the box to the left of the task.