Use transactions to store and track all the aspects of a listing or purchase. Once a transaction is added to your company’s account, it can be viewed and edited by the transaction's agents and admins.
A Transaction in Paperless Pipeline is the container for all the things related to a real estate listing or purchase being handled by your company.
It contains all the relevant dates and information, as well as Checklists & Tasks to help drive transactions to completion, Documents for history and compliance purposes, Contacts for quick reference and use, Messaging for simple, documented communication, and more!
To view a transaction:
- Find the transaction you want to view. You can find active transactions on your Transactions List, or find inactive transactions by searching for them. Learn how →
- Open the transaction by clicking the Transaction Name or Property Address.
- View areas of the transaction (described below).
Transaction Information
The Info sections at the top of the transaction display important dates and other information related to the transaction's listing, contract, or commission.
This Information can be entered when the transaction is added or edited.

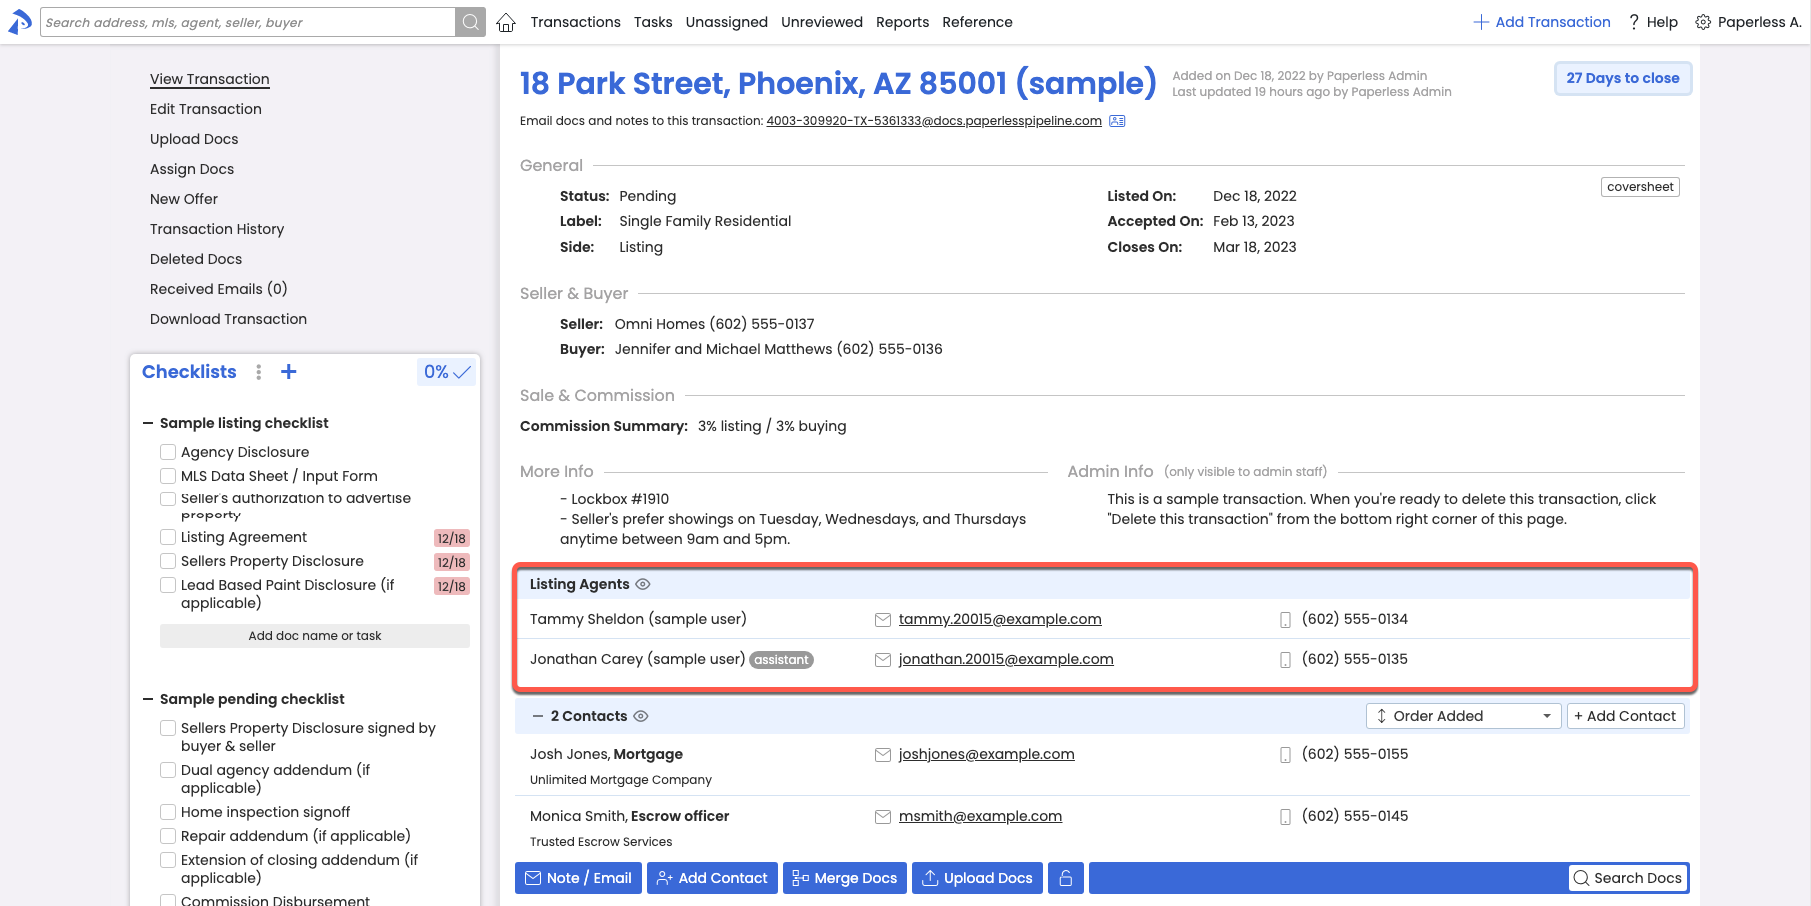
Agents Involved
The Listing Agents and Buying Agents sections display the in-house agents and assistants added to the transaction and granted access to it.
They also display Outside (Co-Op) Agents who do not have access to the system.
Checklists & Tasks
The Checklists section displays Tasks to be completed on the transaction, including what documents need to be uploaded, what actions need to be performed, or any other responsibilities that help drive it to completion.
Checklists can be added to transactions automatically or manually by agents and admins (with the appropriate permissions). Learn more about Checklists & Tasks →

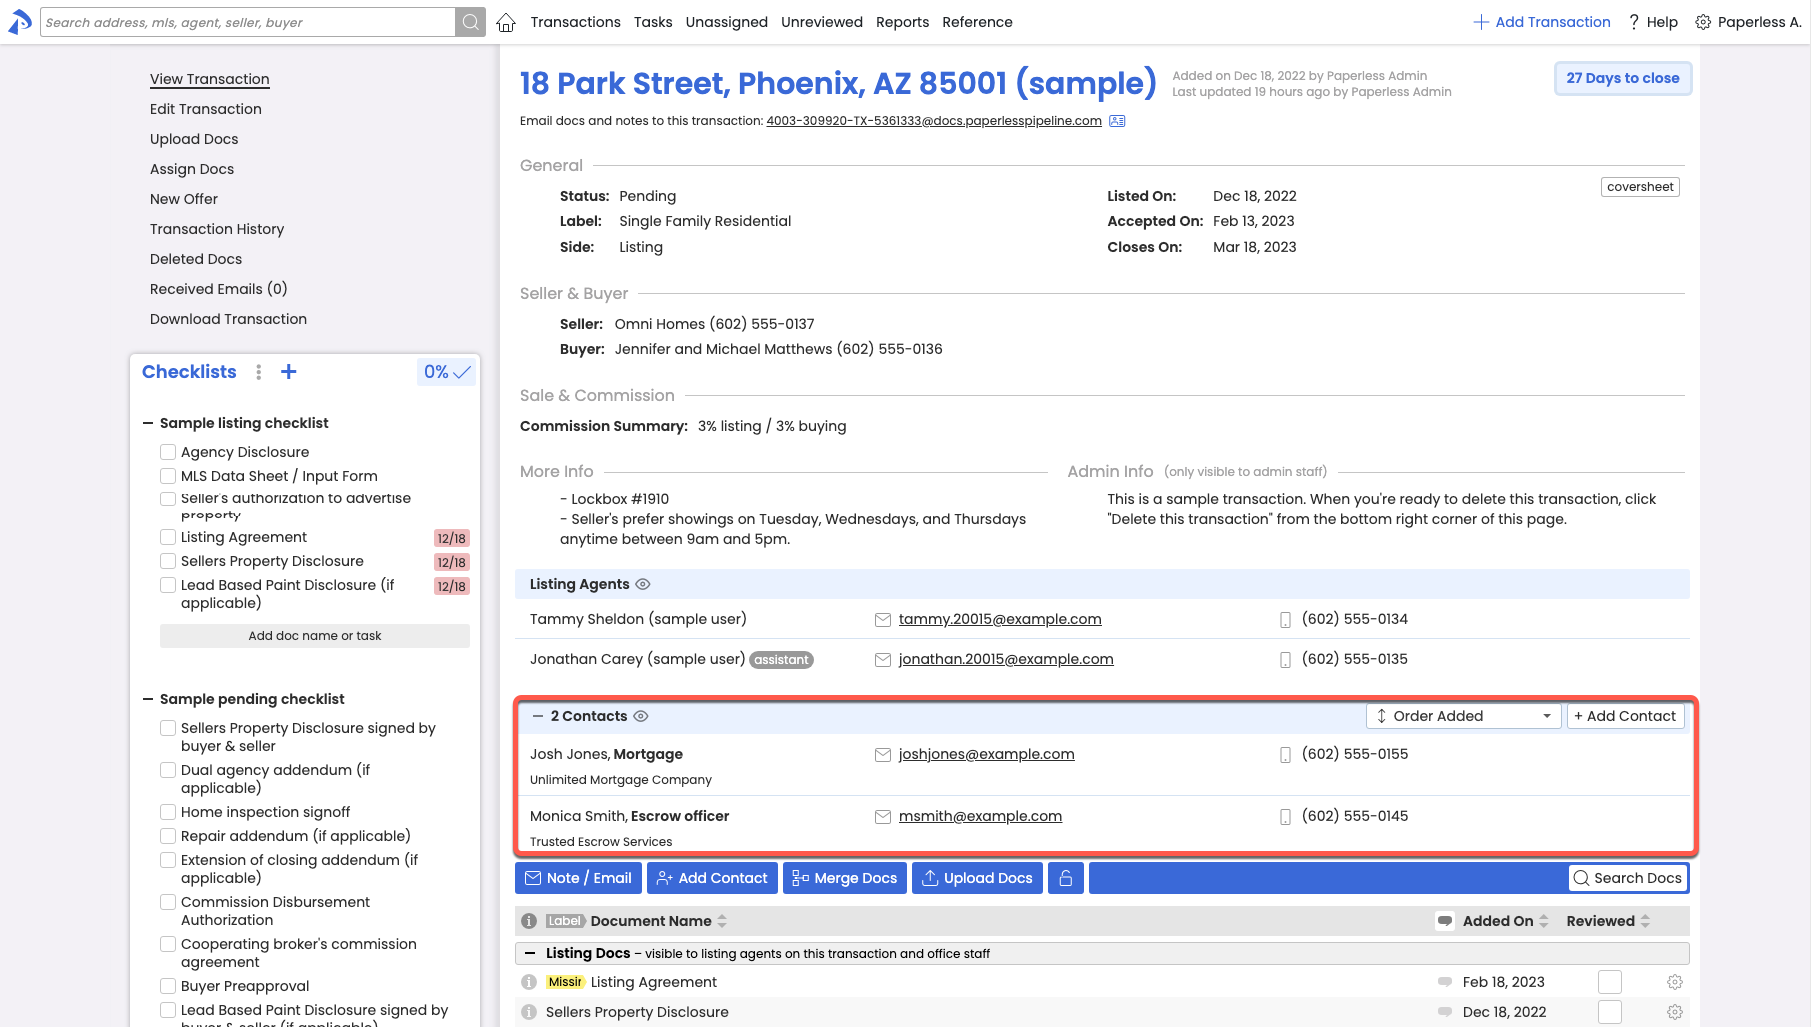
Contacts
The Contacts section displays a list of third-party Contacts involved with the transaction.
Contacts can be added to the transaction by agents or admins. Learn more about Contacts →
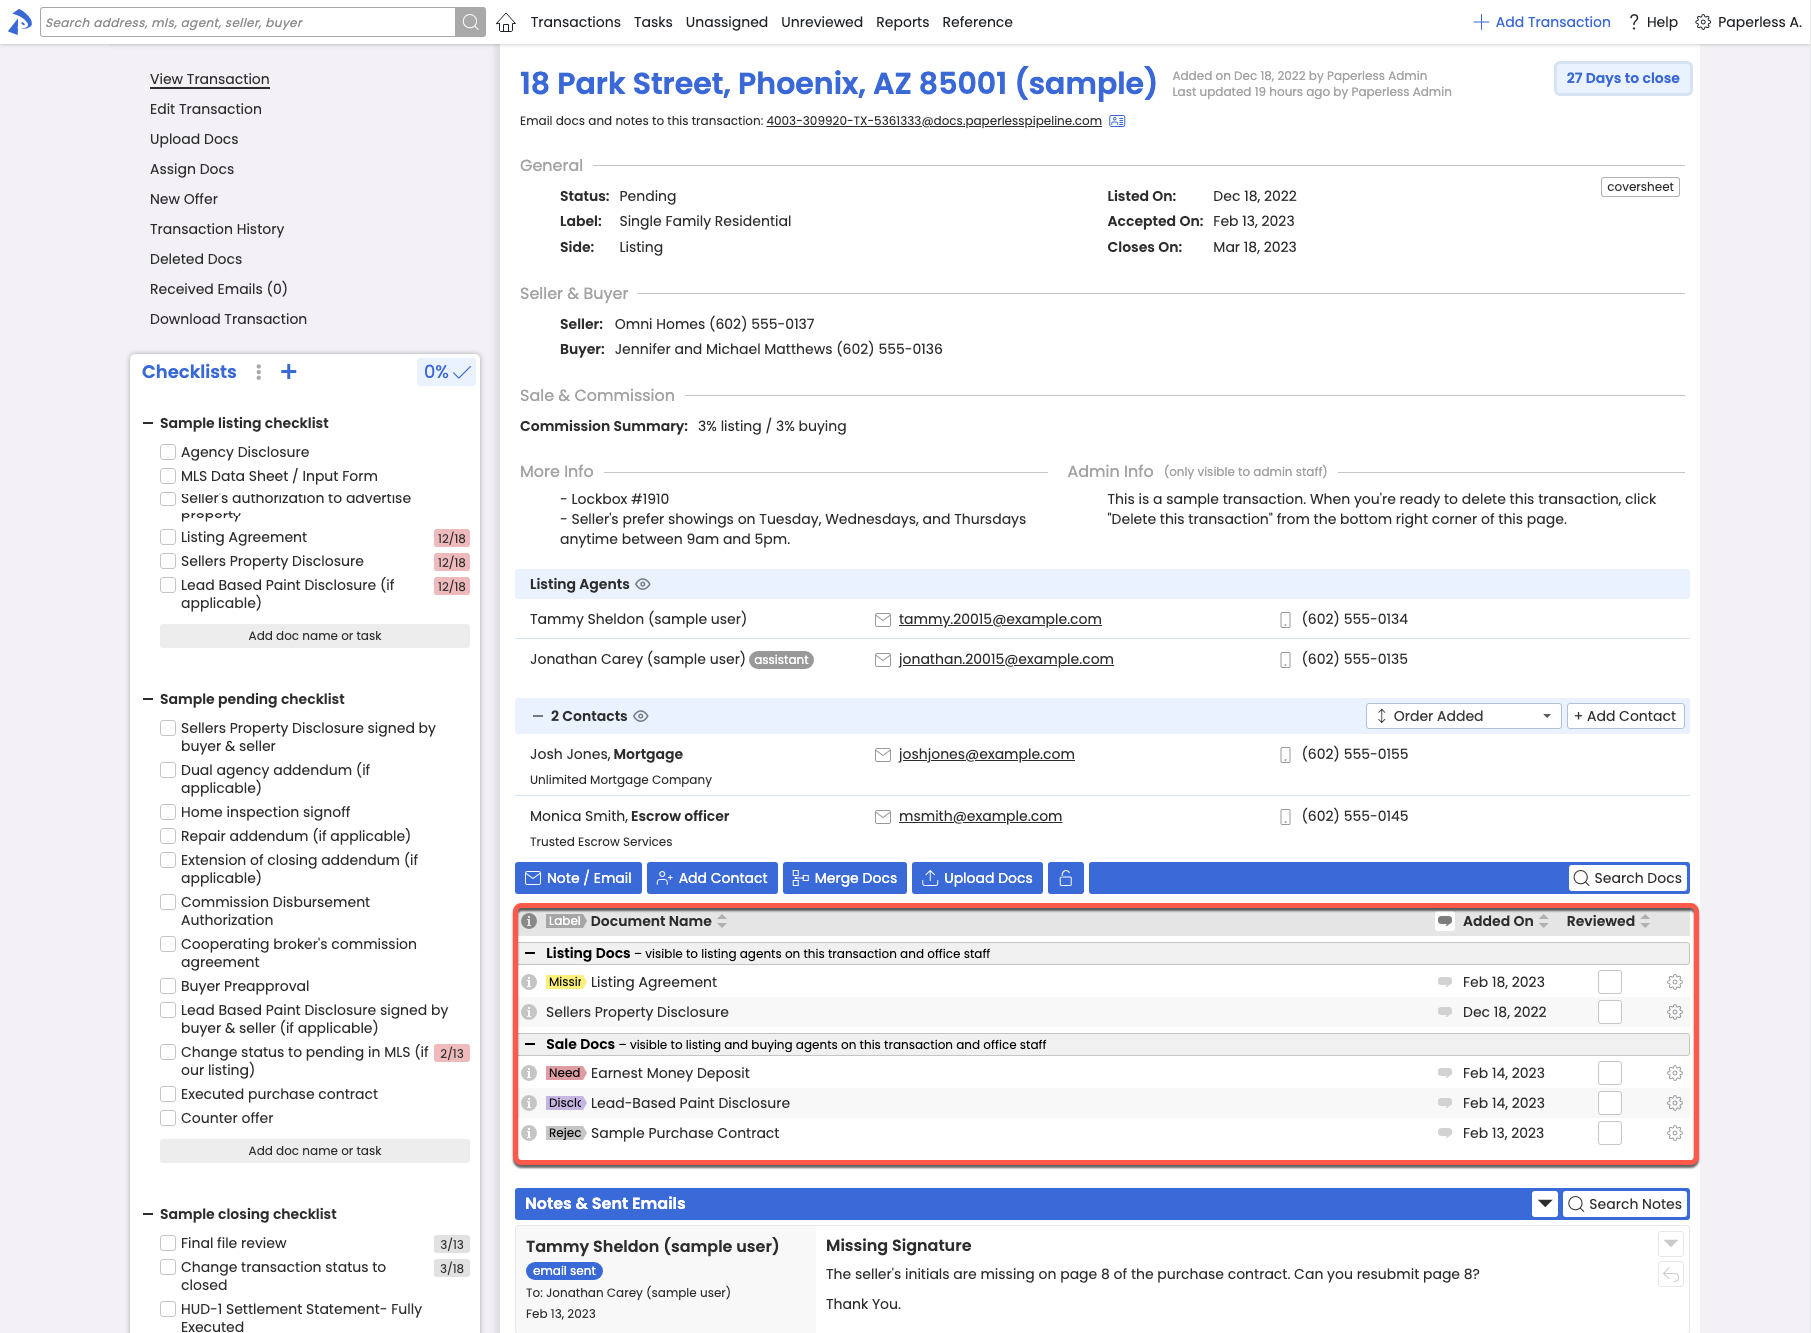
Docs
The Docs section displays documents based on your role on the transaction. For example, if you’re a Listing Agent, you’ll be able to see Listing Docs, Sale Docs, Public Docs, and docs you set to Private.
Docs can be added to transactions by agents and admins (with the appropriate permissions). Learn more about Uploading Docs →
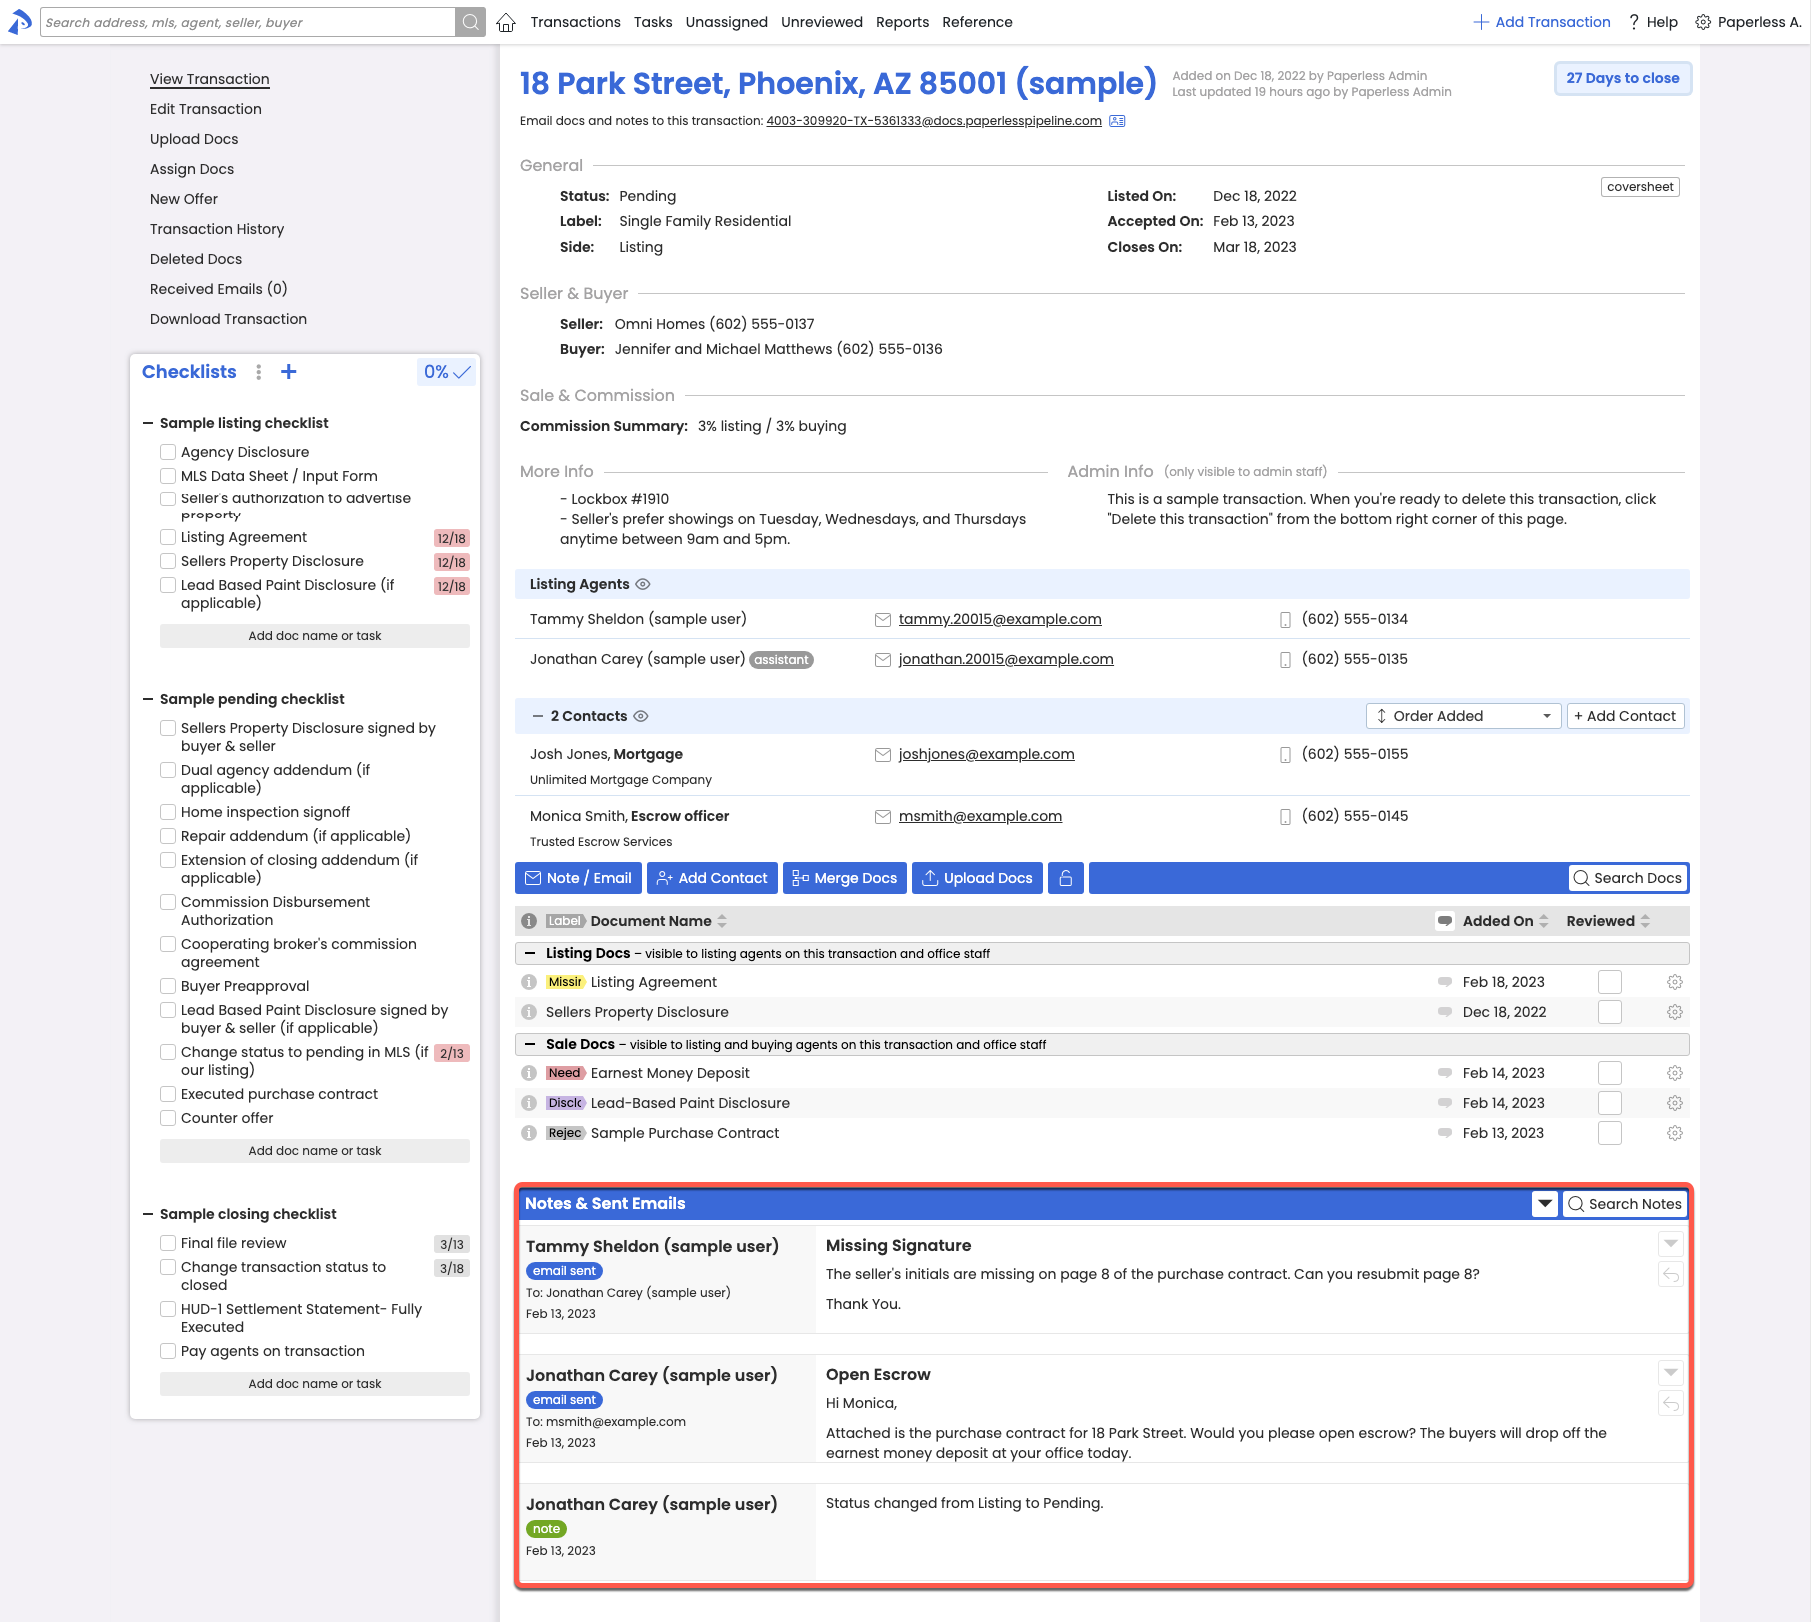
Notes & Sent Emails
The Notes & Sent Emails section lists all notes and emails sent from the transaction.
Notes & Emails may be sent from the transaction by agents and admins. Learn more about Emailing Docs & Notes from a Transaction →
Received Emails
Received Emails can be viewed by clicking Received Emails on the left menu.
Agents and admins (with the appropriate permissions) can send emails to the transaction. Agents can only view emails they send to transactions, and admins can view all received emails. Learn more about Received Emails →
Transaction History
Transaction History can be viewed by clicking Transaction History on the left menu.
Agents and admins can view the Transaction History, but will only see the information that is relevant to them.
To create a new transaction:
- Click [➕ Add Transaction] from the upper right corner of any page.
Or, add a transaction using keyboard shortcuts, Ctrl + Alt + T (Windows) / Ctrl + Opt + T (MacOS). - Add the information you have available for the transaction (outlined below), then save.
Location
Select the Location associated with the transaction (if applicable).
Transaction Name or Property Address
Enter the Transaction Name according to your office's preferred naming convention.
MLS or Transaction Number
Enter the MLS or Transaction Number.
Status
Select the Status that best describes the current stage of the transaction.
Label
Select the Label that best applies to the transaction.
Listing, Expiration, Acceptance & Close Date
Select or enter the Listing Date, Expiration Date, Acceptance Date and Close Date for the transaction in the format mm/dd/yy.
Contingency Dates
Select or enter the Contingency Dates for the transaction in the format mm/dd/yy.
Additional Information
Complete any Other Information or More Info requested by your office.
Admin Info
For admins only, enter any Admin Info that should only be seen by admins and not be visible to agents.
Seller Name & Lead Source
Enter the Seller Name & Seller Lead Source (if applicable).
Add Seller Contact
Optionally, add the Seller as a Contact on the transaction by clicking [add seller as contact] and then entering their Address, Email, Phone, and Fax / Other.
Buyer Name & Lead Source
Enter the Buyer Name & Buyer Lead Source (if applicable).
Add Buyer Contact
Optionally, add the Buyer as a Contact on the transaction by clicking [add buyer as contact] and then entering their Address, Email, Phone, and Fax / Other.
List Price
Enter the current List Price.
Sale Price
Enter the Sale Price if the property is already under contract.
Total Commission
Enter the estimated Total Commission.
Commission Summary
Elaborate on the commission in the Commission Summary, if necessary.
Assign Agents
In the Assign Agents section, add any in-house agents and assistants to the transaction.
Add an Agent
For each agent, search for their name or find it in the list, then check the appropriate Listing or Buying box next to it.
Assigned Agents will appear on the right.
Designate an Assistant
You can also add assistants by adding them as agents, then clicking [make assistant] next to their name.
Assistants will appear in the Assigned Assistants section on the right.
Outside (Co-op) Agents
If agents outside your company are involved in the transaction, check the box next to [This transaction has outside (co-op) agents], then enter the Outside Listing Agent or Outside Buying Agent's Name / Info, Email, and Phone.
Outside (Co-op) Agents can be added for reference only and will not have access to the transaction.
To duplicate a transaction:
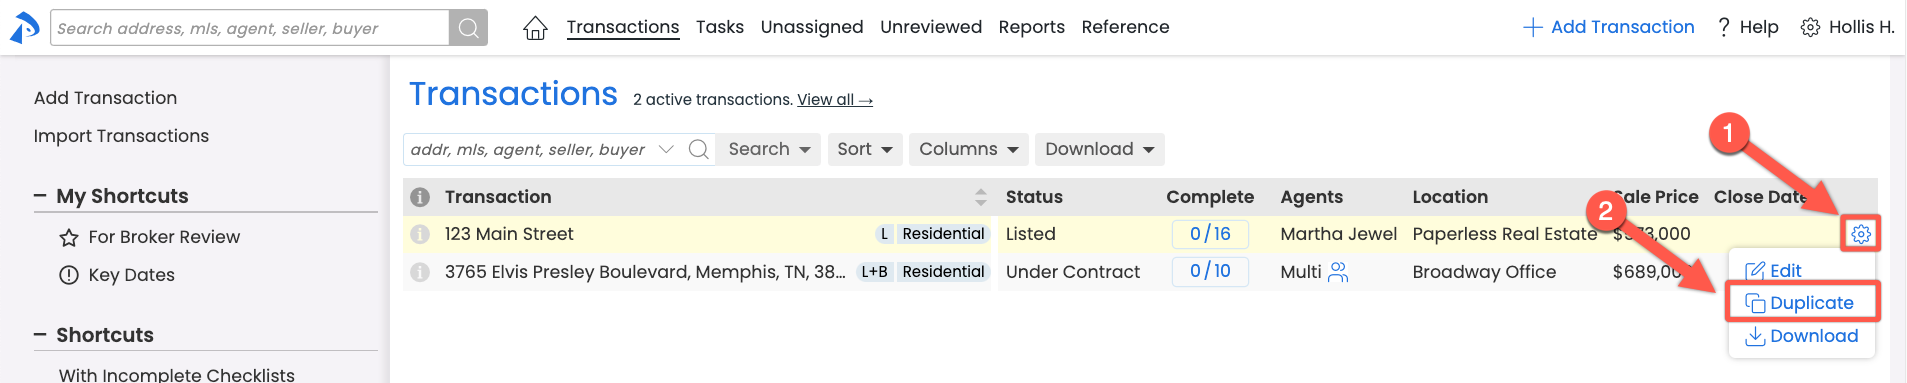
- Go to the Transactions List page by clicking [Transactions] from the top menu.
- Click the transaction's gear, then [Duplicate].
 Need to re-list or add an additional offer to an existing transaction? Use New Offer instead. Learn more about New Offer →
 - If needed, update the Transaction Name for the copied transaction.
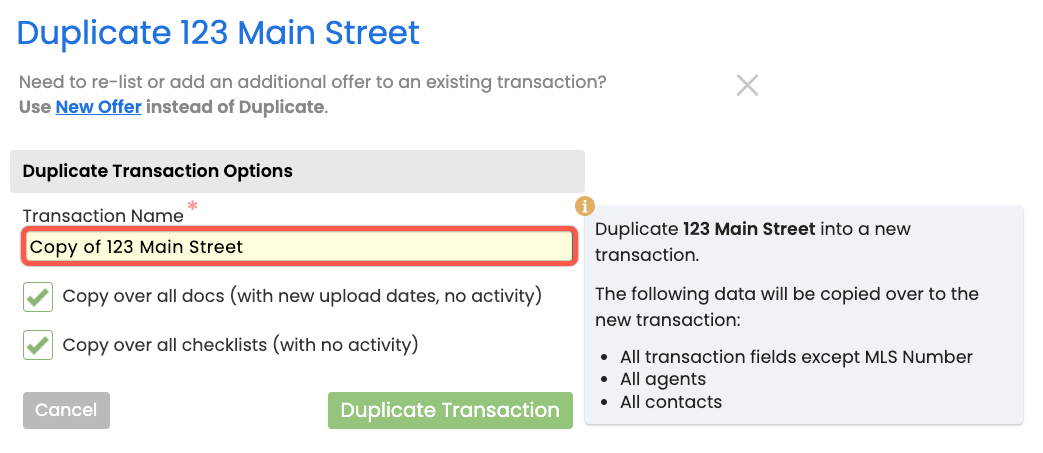
- Check the additional items you want to copy over:
• Click [Copy over all docs] to copy over all docs. Copied docs will have new upload dates with no review / comment activity.
• Click [Copy over all checklists] to copy over all checklists with no activity. If unchecked, any checklists set to be auto-applied will still be added.
- Click [Duplicate Transaction] to create a copy of the transaction.
![The green [Duplicate Transaction] button.](//dyzz9obi78pm5.cloudfront.net/app/image/id/655e1a73347e980d827c5d35/n/click-duplicate-tx.png)
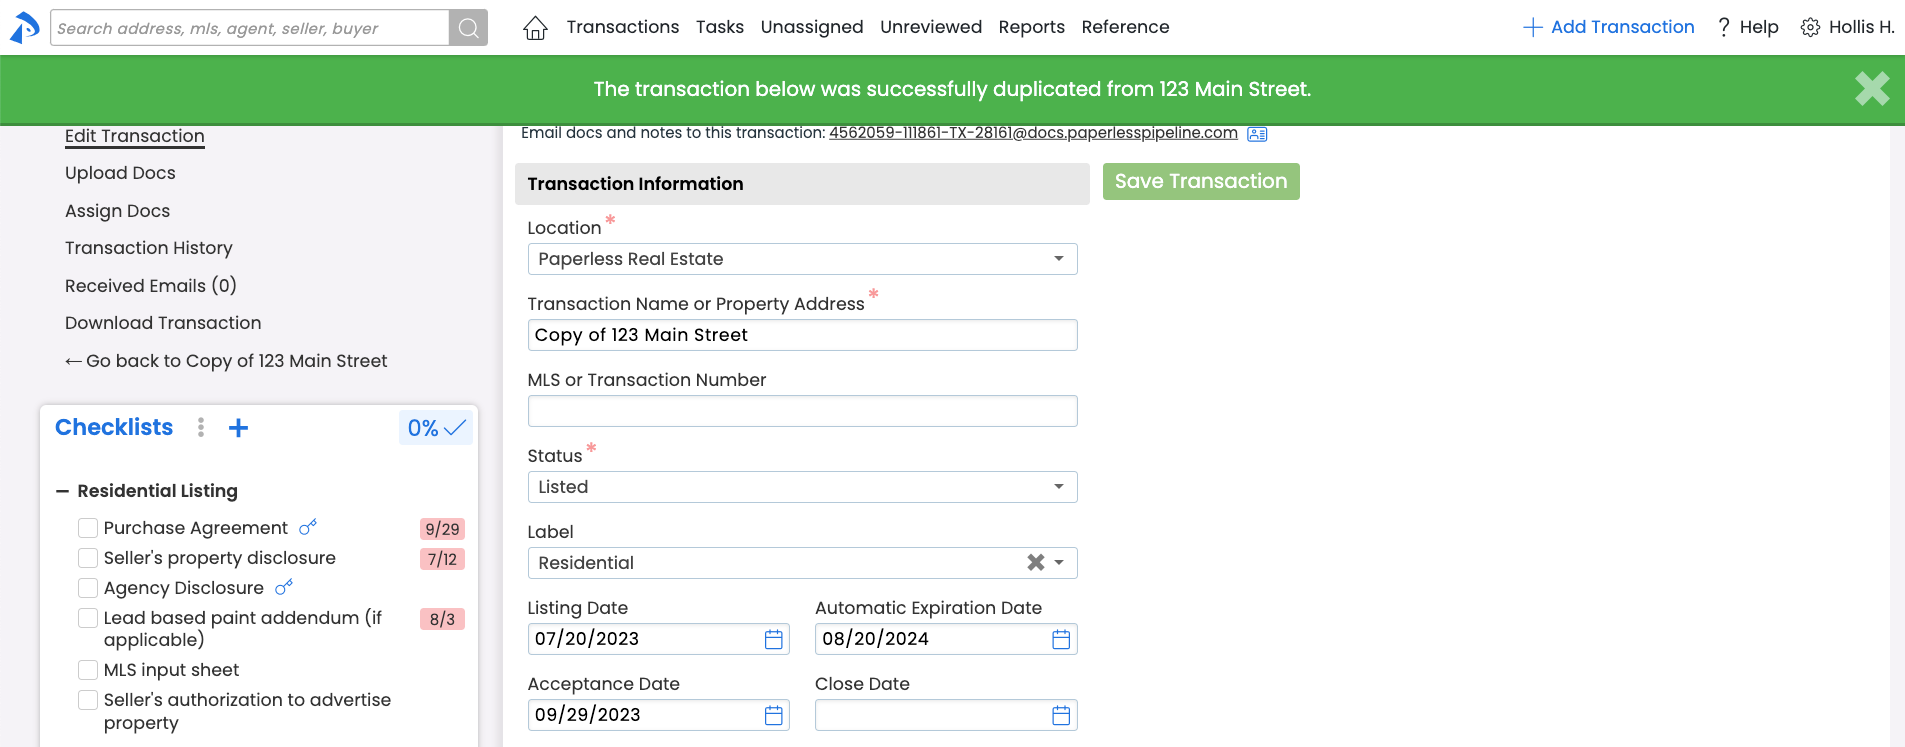
- Add or update any new information for the copied transaction, then save it.


![The green [Duplicate Transaction] button.](http://dyzz9obi78pm5.cloudfront.net/app/image/id/655e1a73347e980d827c5d35/n/click-duplicate-tx.png)

To make changes to a transaction:
- Go to the Transaction
- Open the transaction where you need to take action.
- Click [Edit Transaction] from the left menu.
- Add or update any new information you have for the transaction (described above), then save it.
To delete a transaction permanently:
- Go to the Transaction
- Open the transaction where you need to take action.
- Scroll to the bottom, then select [Delete this transaction] in the lower right corner.
- Confirm permanent deletion of the transaction by clicking [Delete Permanently].