Learn how to automatically generate scheduled messages based on transaction dates being met or checklist tasks being completed.
Introduction
Communication is crucial, so sending messages at the right time can make all the difference. Set your Message Templates to automatically generate scheduled messages based on transaction dates being met or checklist tasks being completed.
Once the milestone you specify has been met on a transaction, you’ll be notified via email that a message has been generated for that transaction, and that it’s waiting for you to review and send in your Scheduled Messages queue.
You can also draft messages directly from transactions to be automatically sent at a later time. Learn how →
Who Can Do This?
All Pipeline users can set their own Message Templates to automatically generate scheduled messages.
Set Up a Scheduled Message
Schedule a Message Relative To A Transaction Date
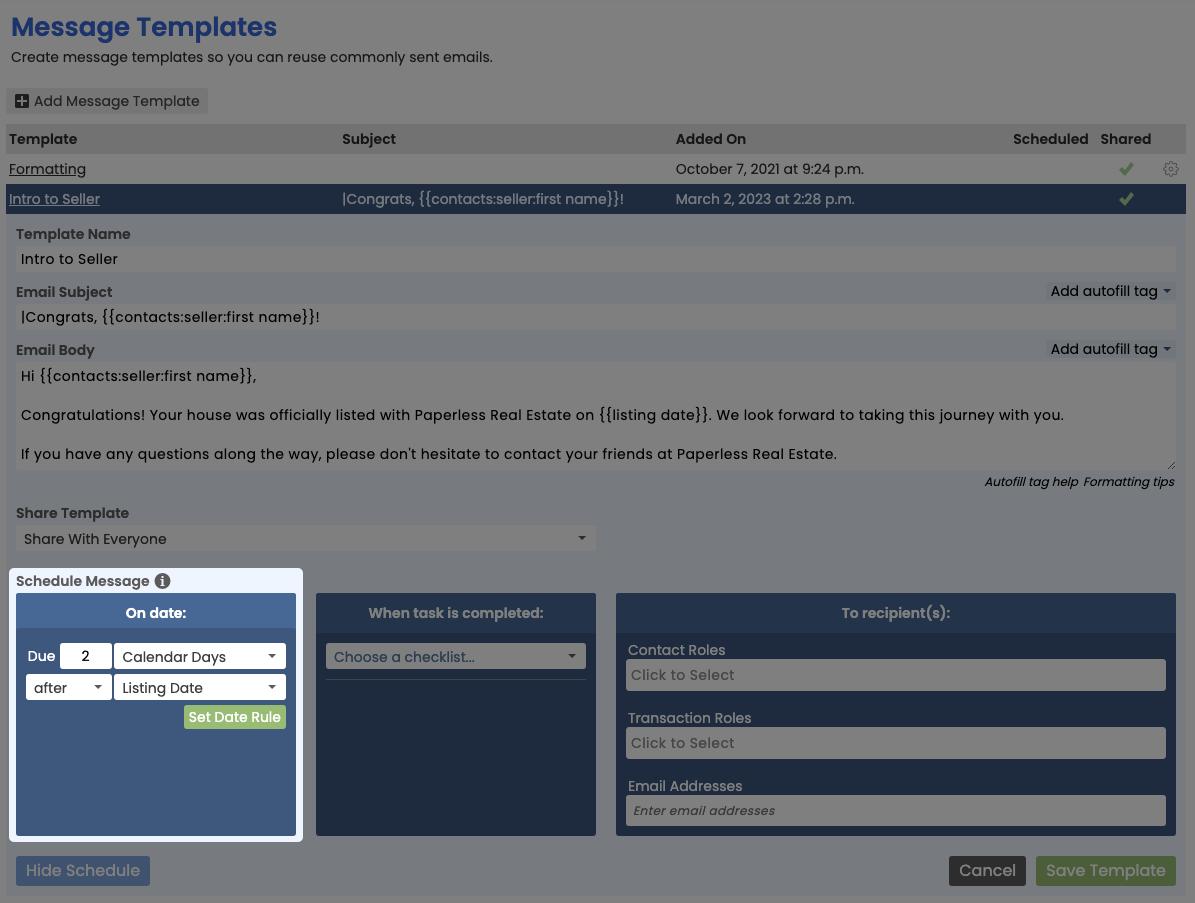
Schedule messages to be generated relative to a date on a transaction. Whenever the date rule you set for the template is met on a transaction, Pipeline will automatically generate a message.
For example, if you schedule a message to be generated 2 calendar days after a transaction's Listing Date, and the Listing Date for 123 Main Street is April 1st, a message will be generated for 123 Main Street on April 3rd.
To schedule a message to be generated relative to a date on a transaction:
- Add or edit an existing Message Template. Learn how to Create & Manage Reusable Message Templates →
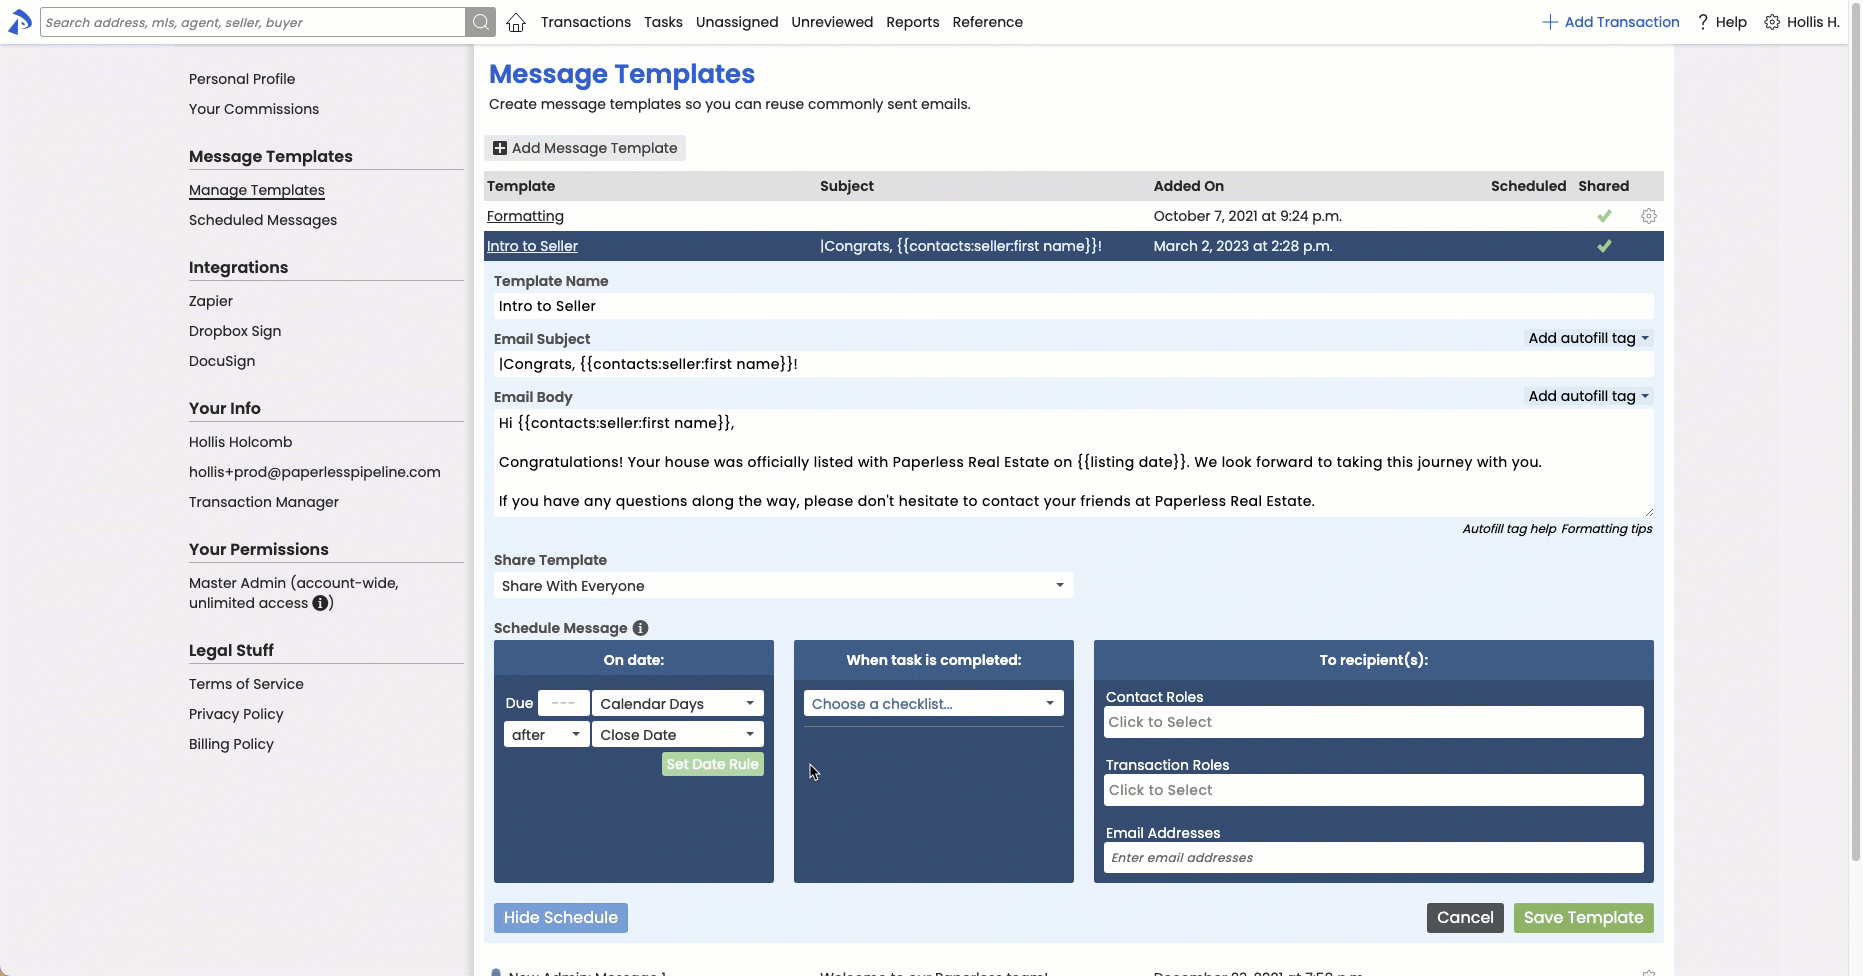
- Click [Schedule Template] at the bottom of the Message Template.
- Set the date rule for sending the message in the On Date area, then click [Set Date Rule].
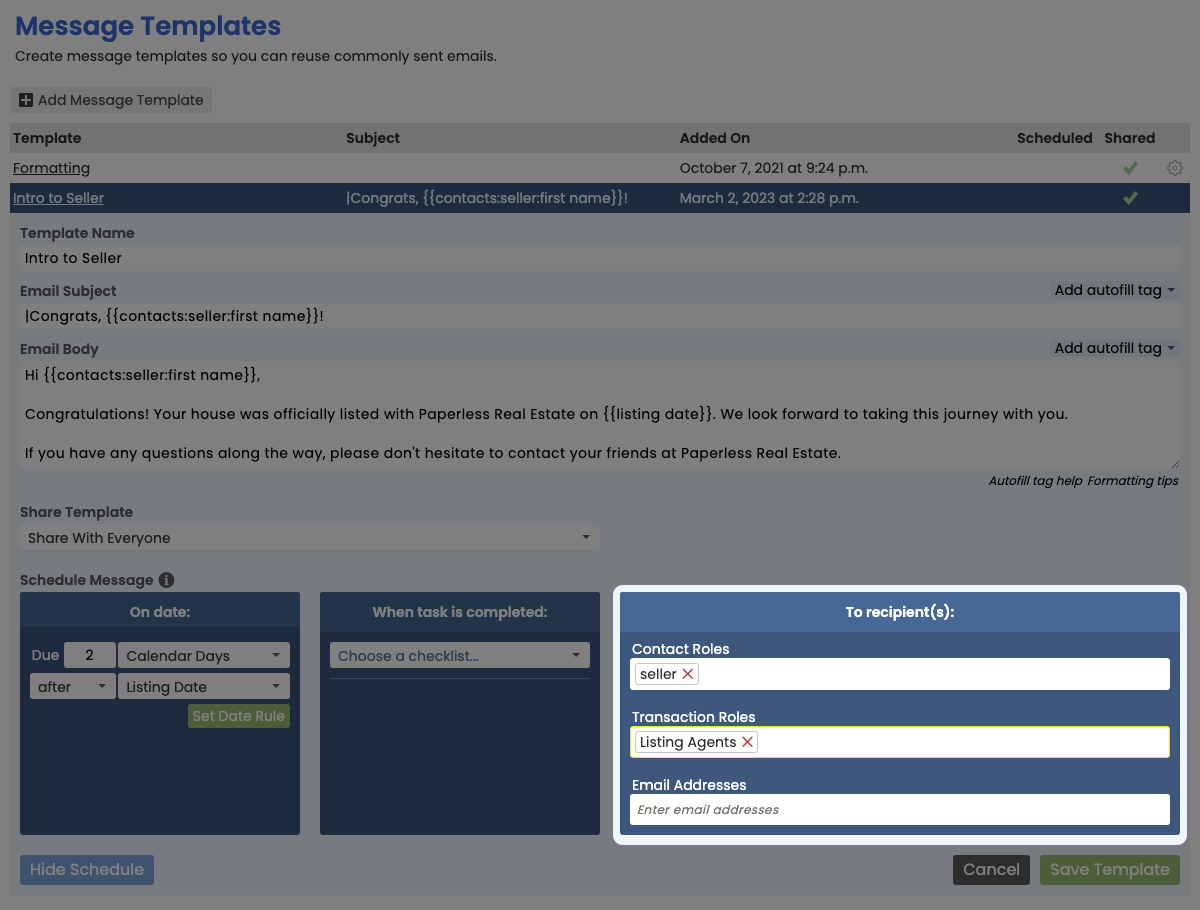
- Choose your desired recipients in the To Recipient(s) area.
- Click [Save Template]. Whenever a transaction meets the specified date rule, you will receive a notification email the following morning (at 5am EST) informing you that a message has been scheduled along with a link to the Scheduled Messages page.


Schedule a Message When a Task is Completed
Schedule a message to be generated when a specific task has been completed on a transaction. Whenever the task gets marked as fully complete on a transaction, Pipeline will automatically generate a message.
For example, if you schedule a template to be generated when your Listing Agreement task is completed, and the Listing Agreement task gets marked as fully complete on 123 Main Street, a message will be generated for 123 Main Street.
To schedule a message to be generated when a task has been completed on a transaction:
- Add or edit an existing Message Template. Learn how to Create & Manage Reusable Message Templates →
- Click [Schedule Template] at the bottom of the Message Template.
- From the When Task is Completed Area, select the task you would like to trigger a message to be sent.
- Choose your desired recipients from the To Recipient(s) area.
- Click [Save Template]. Whenever the selected task is marked as complete on a transaction, you will receive a notification email the following morning (at 5am EST) informing you that a message has been scheduled along with a link to the Scheduled Messages page.

Manage Your Scheduled Message Queue
Whenever a message has been generated, you'll be alerted via email, along with a link to your Scheduled Messages page where you can review and send the message.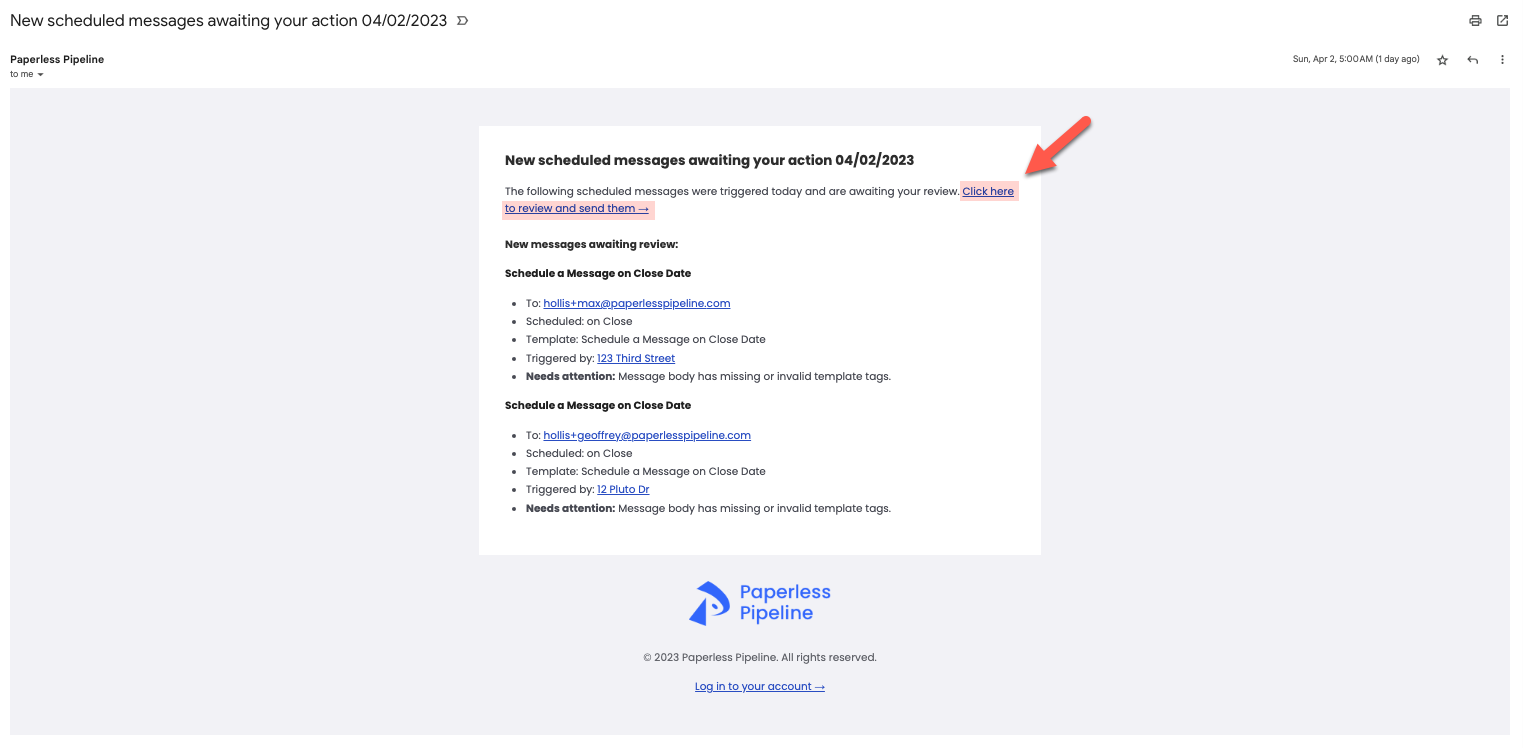
Whenever you log into Pipeline, you'll also be alerted on the Home Page if you have any scheduled messages awaiting your review.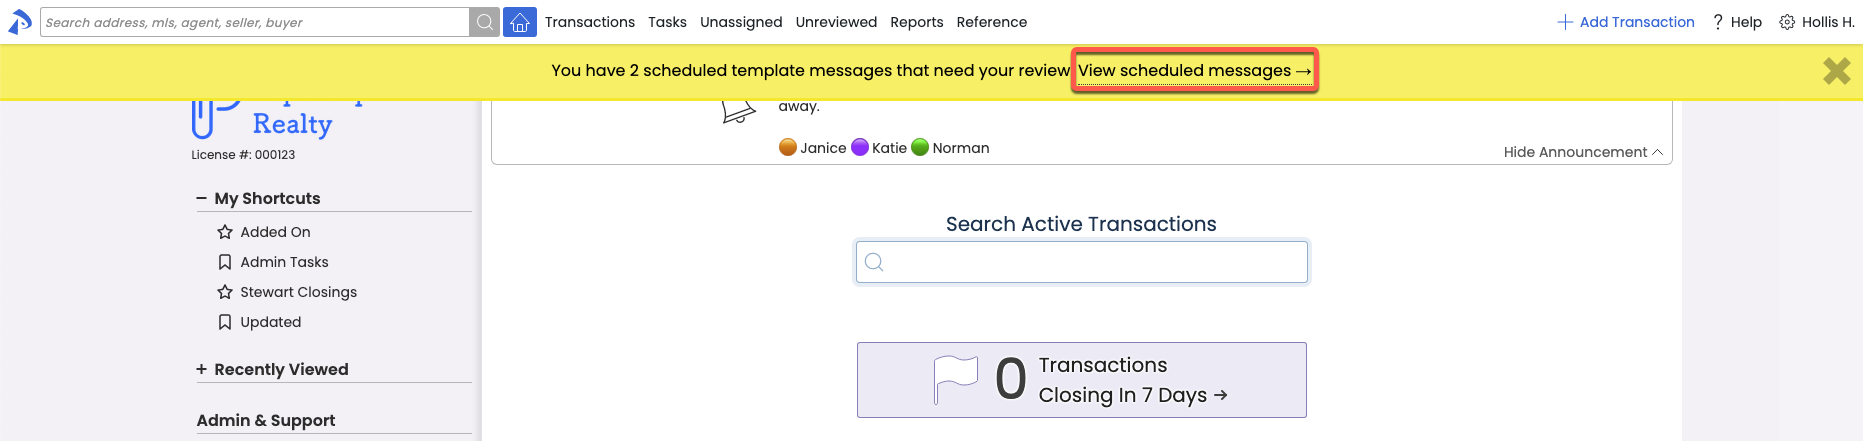
View Your Scheduled Messages Queue
To view your Scheduled Messages queue:
- Go to your Personal Profile by clicking your name in the upper-right, then [Personal Profile].
- Click [Scheduled Messages] from the left menu. On the Scheduled Messages queue, you'll be shown a list of your scheduled messages awaiting your review.
From here, you can preview, edit, send or delete scheduled messages.

Preview a Scheduled Message
To preview a scheduled message:
- Go to your Scheduled Messages queue.
- Click the name of the message you want to preview or the eye icon. You will be shown a preview of the message to be sent along with any errors found.
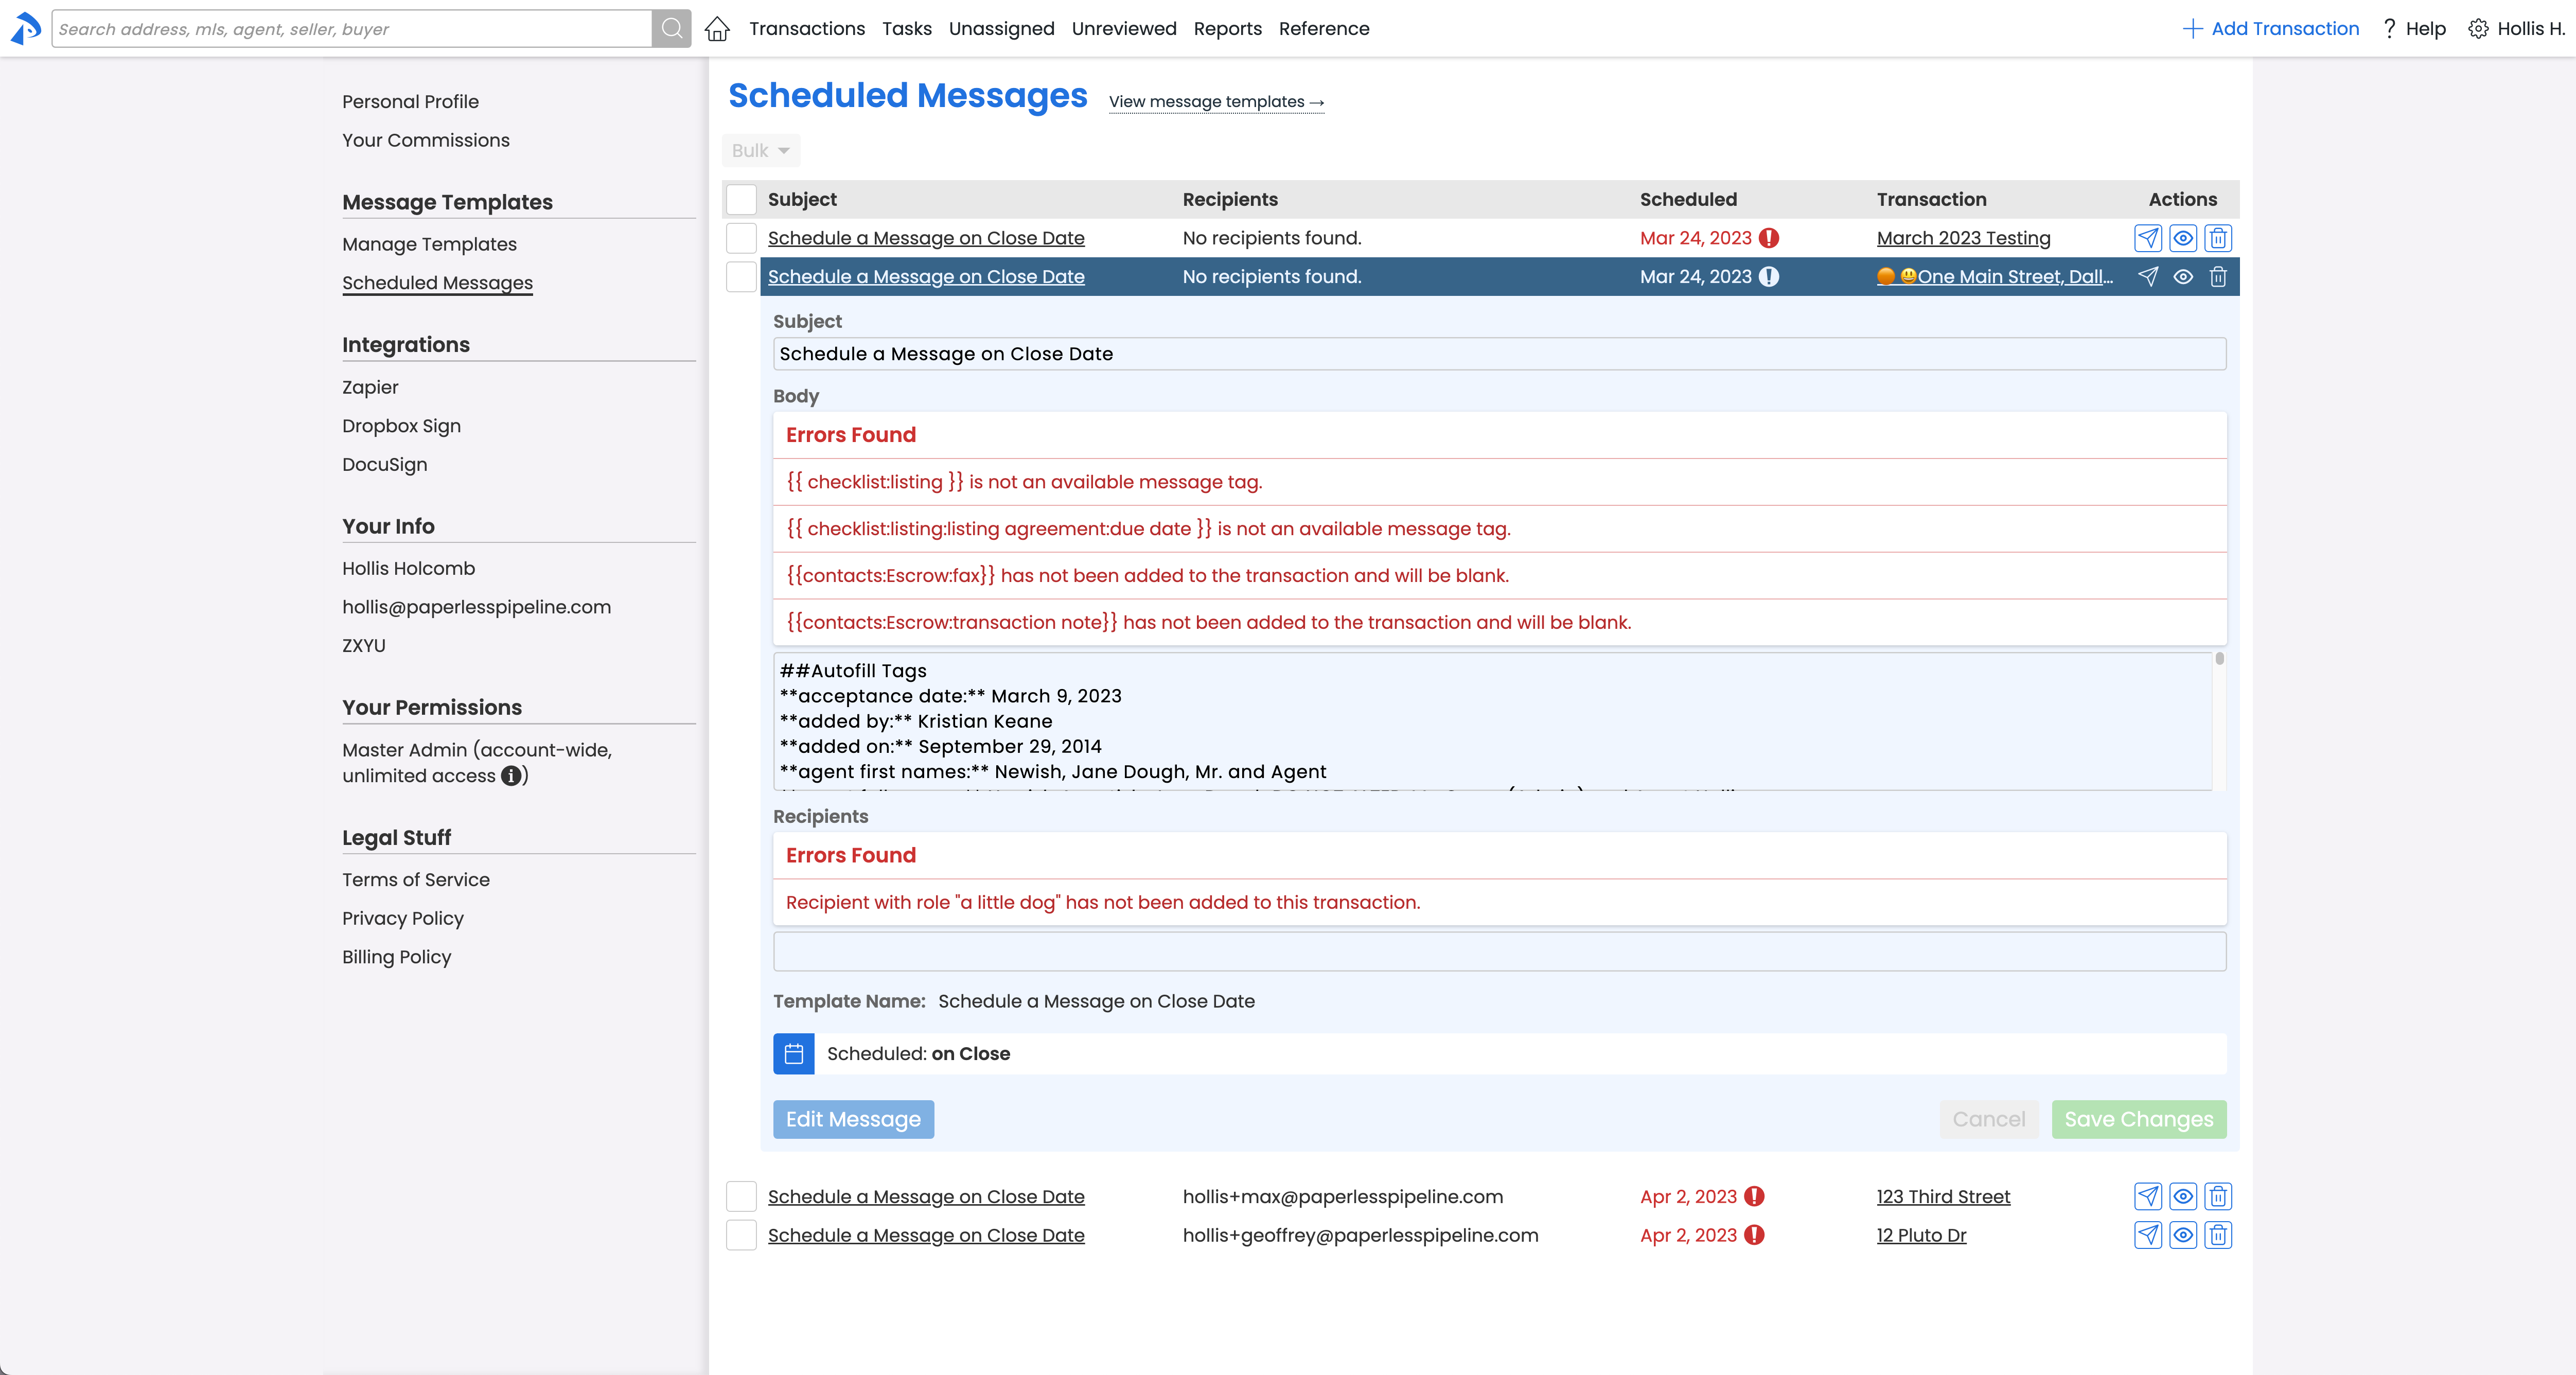

Edit a Scheduled Message
To edit a scheduled message:
- Go to your Scheduled Messages queue.
- Click the name of the message you want to edit.
- Scroll down to the bottom of the message, and click [Edit Message].
- Make your desired changes to the Subject, Message Body and/or Recipients.
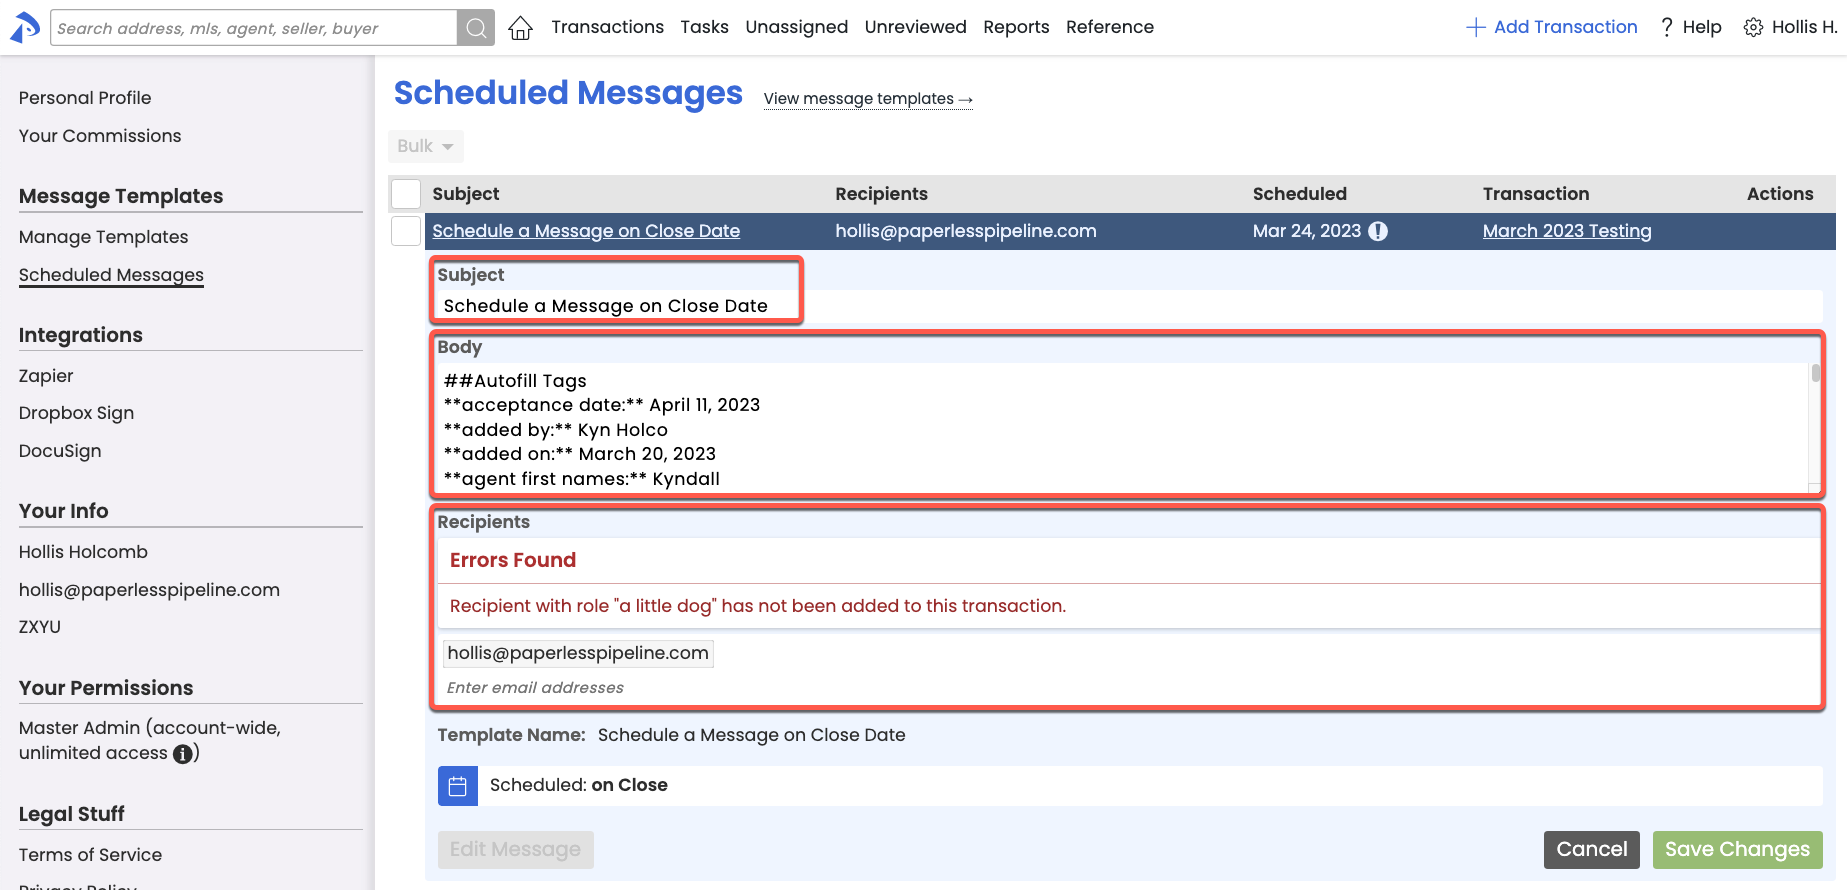
- Click [Save Changes].

Send a Scheduled Message
To send a scheduled message:
- Go to your Scheduled Messages queue.
- Click the name of the message you want to send to expand it and review its contents.
- Click the [Send icon] next to the message you want to send.


Delete a Scheduled Message
To delete a scheduled message:
- Go to your Scheduled Messages queue.
- Click the [trash can icon] next to the message you want to delete.


Pipeline Pro Recording: Scheduled Messaging 🎥
April 19, 2023
This week we'll cover all the glorious details related to automating both your message templates and transaction messages to ensure your recipients get the right messages when they most need them.