Learn how to set up and optimize your company's Transaction Labels and other settings related to Transaction Labels.
Introduction
Transaction Labels allow you to classify your transactions and typically represent the property type of a transaction (e.g., Residential, Commercial, Land and Lot, Rental, and Condo, etc.).
Transaction Labels play a critical role in Auto-assigning Checklist Templates and ensuring the appropriate tasks are added to transactions based on their property type.
The main benefits of using Transaction Labels include the ability to:
● Automatically assign checklists to transactions based on property type and other criteria.
● View a transaction's property type at-a-glance on the Transactions List.
● Filter and download reports and search results based on property type.
Who Can Do This?
Only master admins can complete the full setup of Commission Module.
Video 🎥
1:50
Set Up Transaction Labels
To set up Transaction Labels:
- Go to Admin / Settings by clicking your name in the upper-right, then [Admin / Settings].
- Click [Transaction Labels] from the Customize section of the left menu.
Add a Transaction Label
To add a Transaction Label:
- From the Transaction Labels area in Admin / Settings, click [Add Label].
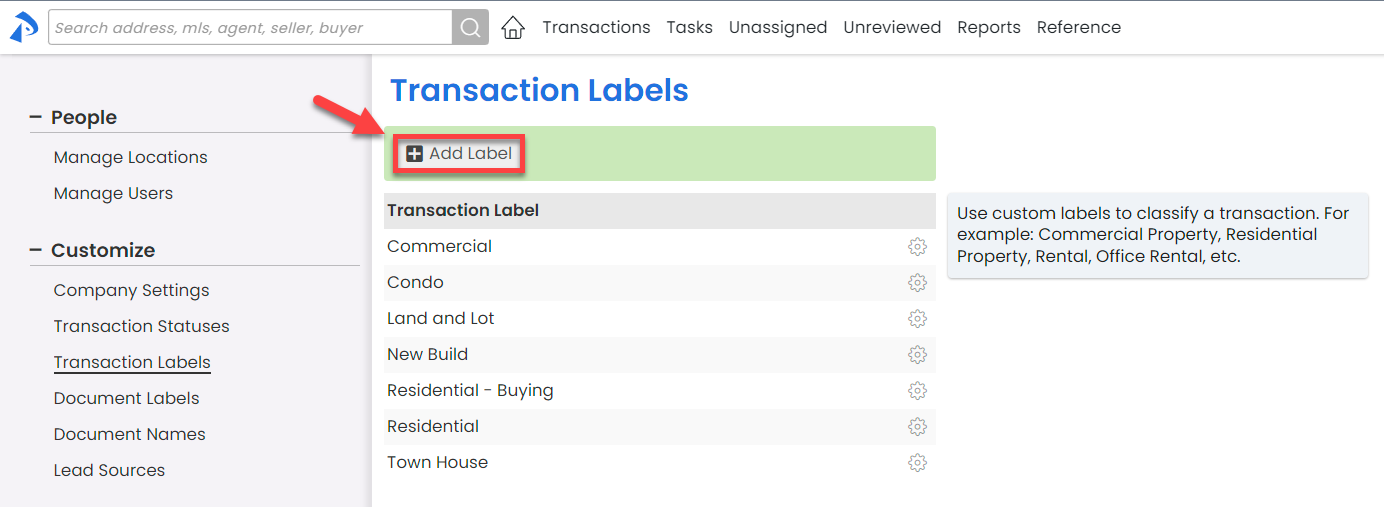
- Enter the Label Name.
- Click [Add Label] to save the new label.
Edit a Transaction Label
To edit an existing Transaction Label:
- From the Transaction Labels area in Admin / Settings, click the [⚙️] to the right of the label, then [Rename].
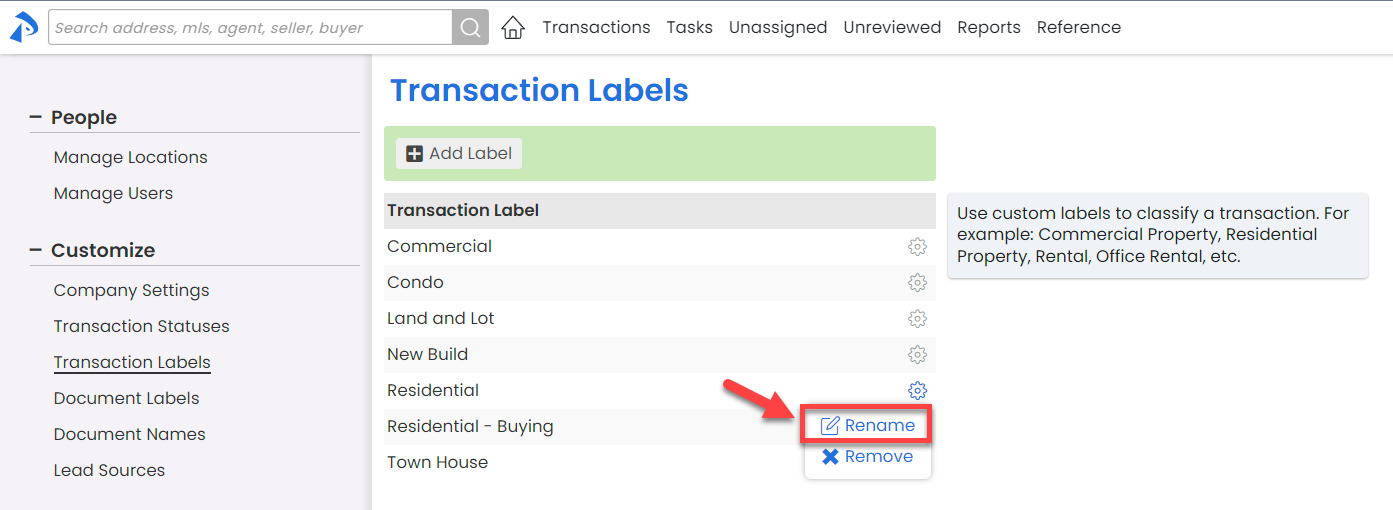
- Enter the new Label Name.
- Click [Save] to update the label.
- If the original Transaction Label is applied to any existing transactions, Pipeline will give you the option to change the Transaction Label of those existing transactions.
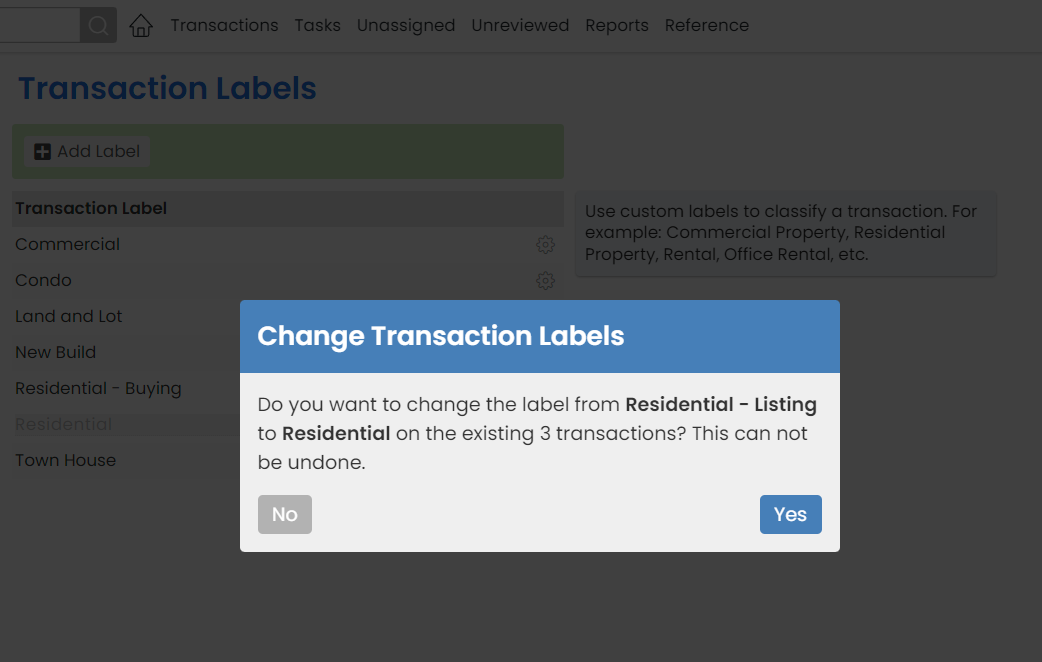
● To update the Transaction Label on transactions where the original label is applied, select [Yes]. Pipeline will confirm the number of transactions updated.
● To leave the original label on transactions, select [No]. The original label will remain on transactions where it was already applied.


Delete a Transaction Label
To delete a Transaction Label:
- From the Transaction Labels area in Admin / Settings, click the [⚙️] to the right of the label, then [Remove].

- Click [remove] again to confirm the deletion.

Other Transaction Label Settings
Require Transaction Label (Company Settings)
You may set your account to require a Transaction Label on all transactions. By default, a Transaction Label is not required on transactions.
To require a label on all transactions:
- Go to Admin / Settings by clicking your name in the upper-right, then [Admin / Settings].
- From the section for Transaction Settings, check the box next to [Require Transaction Label].
- Click [Save Settings].
Requiring a Transaction Label is especially helpful when you've set up Auto-Assigning Checklist Templates based on Transaction Label and want to ensure the proper Checklist Template is added to all transactions. Learn about other Company Settings →
Auto-Assign Checklists Based on Transaction Label (Checklist Templates)
Checklists can be set to automatically assign to transactions based on a transaction's label. Learn how to Automatically Assign Checklist Templates to Transactions →
Apply a Transaction Label to a Transaction
To apply a label to a transaction:
- When adding or editing a transaction, click the [Label] dropdown.
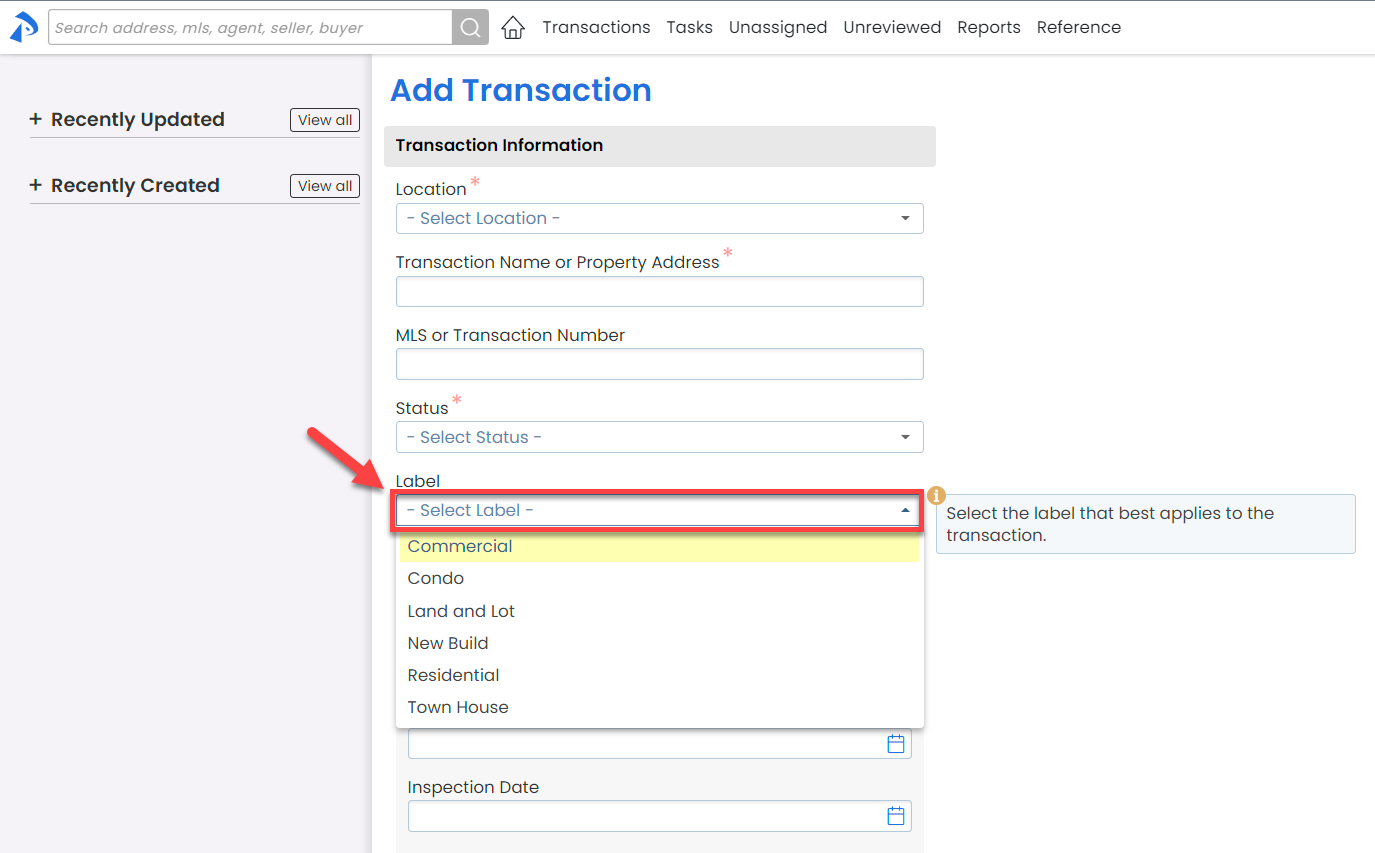
- Select your desired label for the transaction.
- Click [Add Transaction] or [Save].

If you currently use the Transaction Status to classify the property type, we strongly recommend using Transaction Labels instead.
Pipeline Pro Webinar Recording: The Hidden Benefits of Transaction Labels 🎥
This webinar covers how Transaction Labels help make your workflow more efficient in areas you may not realize. When used correctly, Transaction Labels are a huge time saver and essential for simplifying and automating your account.
View more Paperless Pipeline Pro Webinars here →