Pipeline eSign Forms are reusable templates for signature requests that can automatically fill in details from the transaction, define who needs to sign, and identify what information they need to enter. They give your team a consistent, efficient starting point for your most frequently signed documents.
Forms in Pipeline eSign make it easy for you and your team to send signature requests for the docs that need to be signed most often. Instead of starting from scratch each time, use a ready-made template built for your most common workflows.
Forms are created using PDFs from your shared Reference Library. They include everything you need up front; signer roles, autofilled transaction info, custom text, signature fields, and more.
When it's time to send, just pick the right form, confirm the details, and send it off. Optionally, you can even add or update any information if needed.
This saves time, reduces mistakes, and gives everyone a smoother, more consistent signing experience.
Admins Create the Form
From the shared Reference Library, master admins can turn PDFs into reusable forms by choosing a doc, identifying signers, and placing fields exactly where they belong.
Once created, a form becomes a reliable template your team can use again and again for fast, accurate signature requests.
Smart Signer Selection
Admins can set up forms with all possible signers, but each sender can choose which signers to include when sending the request.
Team Members Prepare and Send
When it's time to send a request, a team member selects the right form, confirm the details, and fills in any deal-specific info. All fields can be edited, so it's easy for the sender to make changes to fit each situation on the fly.
Signers Review and Sign
Signers get a secure link with just the fields they need to fill out. It's a smooth, straightforward experience that works on any device.
Turn a Reference doc into a structured, reusable form with the key fields and transaction information already in place for senders and signers.
Who Can Do This: Master admins whose company is subscribed to Pipeline eSign.
To create a form:
- Go to Your Reference Library
- Click [Reference] from the top menu.
If you don't have PDF documents in your Reference Library, add some first. Learn how.
- Choose a Doc to Convert to a Form
- Find the PDF doc you want to turn into a form.
- Click the gear next to it and select [Convert to Form].
- Select a Signer
- Choose the role of someone who will always sign this form using the Signers dropdown in the right menu.
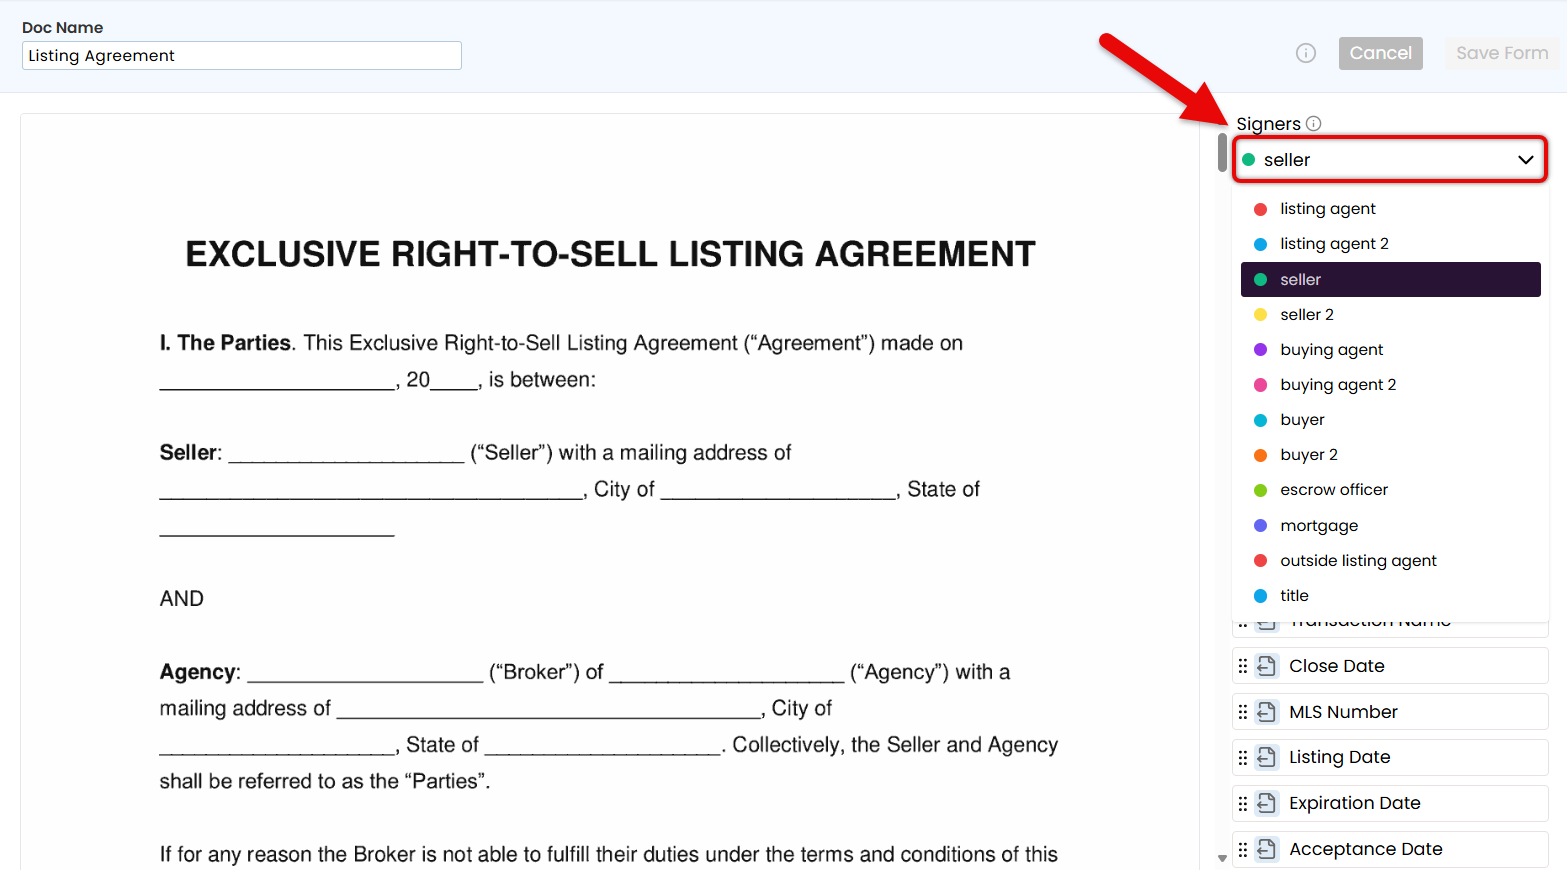
Start with the primary signer — someone who always signs, like the Seller or Buyer. This keeps the form organized and fields tied to the right roles.
- Choose the role of someone who will always sign this form using the Signers dropdown in the right menu.
- Add Fields to Set the Form Structure
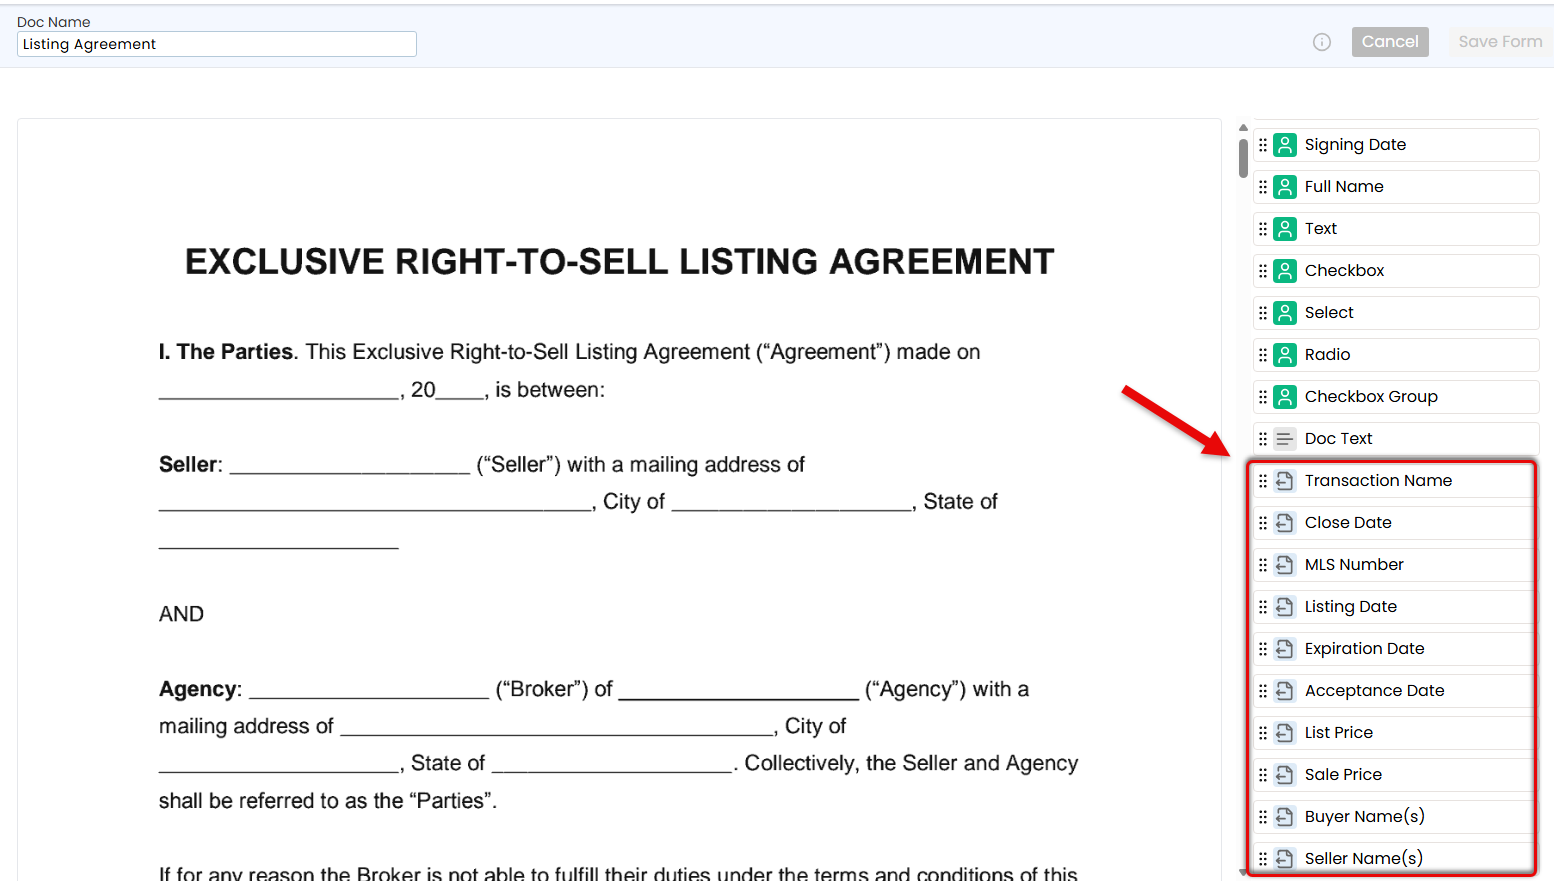
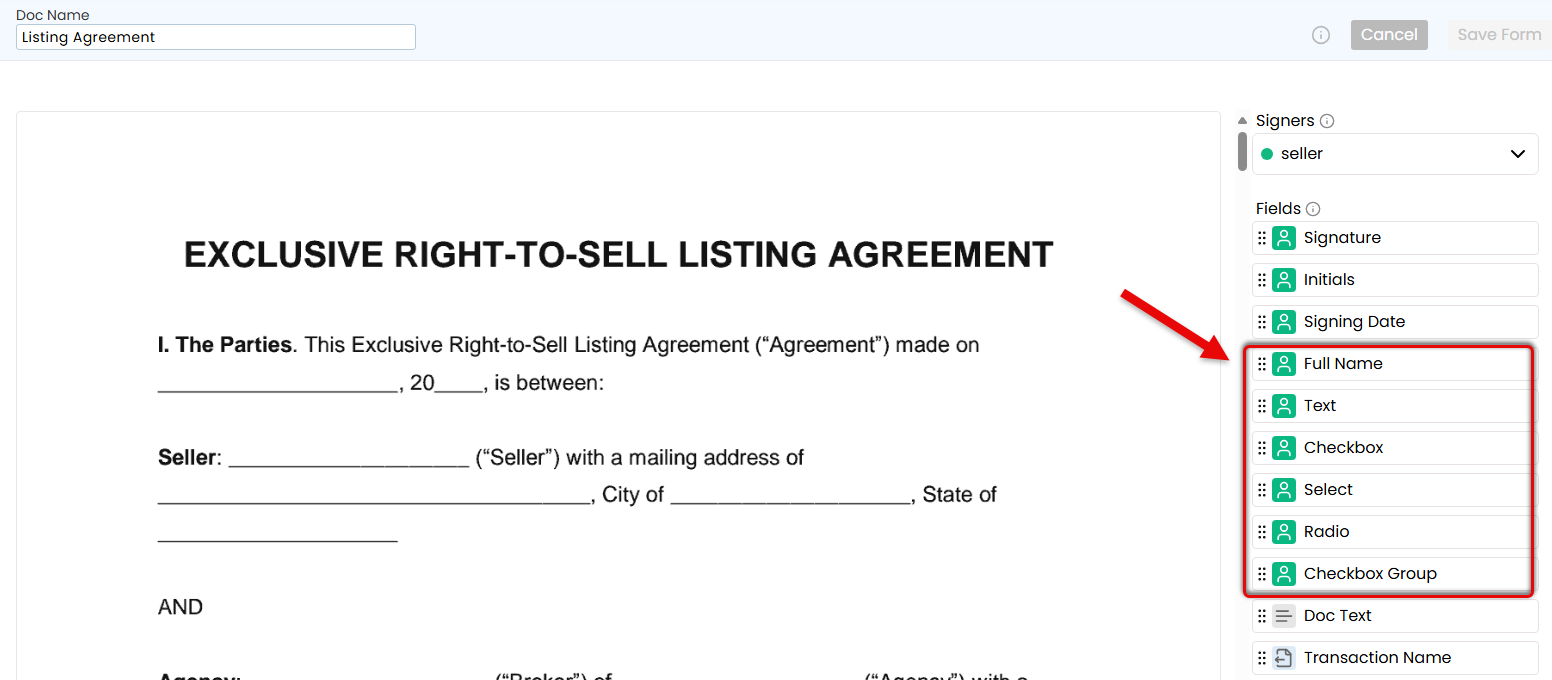
- Drag the necessary fields from the Fields section on the right, and drop them onto the doc on the left (outlined below).
Autofilled Transaction Info
Insert Transaction Info fields to automatically pull key details directly from the transaction, like Transaction Name, Listing Date, and Buyer Name(s).
Transaction Info can be entered by the admin and / or sender. If the information is missing at time of sending, the sender will be required to enter it.
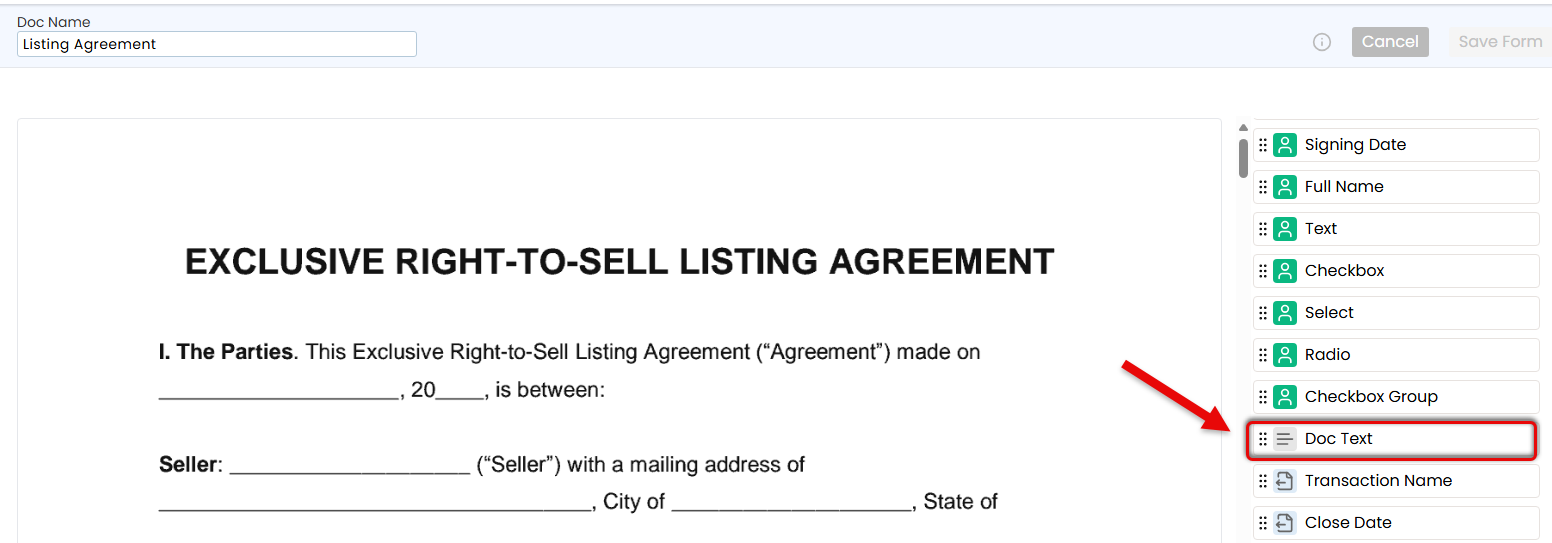
Document Text
Insert Document Text for any standard text that should appear every time the form is used, like brokerage name, company details, or any required legal language.
Document Text can be entered by the admin and / or sender. If the information is missing at time of sending, the sender will be required to enter it.
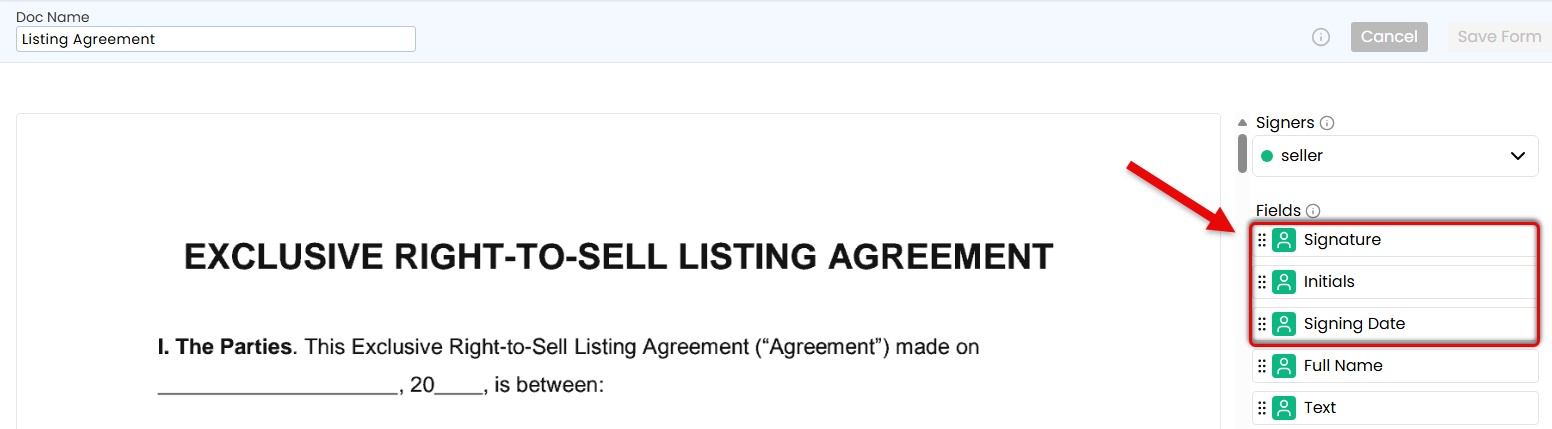
Signer Fields
Insert fields the signer is responsible for completing: Signature, Initials, and Signing Date.
Flexible Fields
Insert flexible fields that can be completed by either the sender or signer, depending on who has the information.
- Add Full Name to automatically pull the signer's details directly from the transaction.
- Add a Text field when you need a flexible space that either the sender or signer can fill in with custom information.
- Add a Checkbox field whenever it will be needed on the form.
- Add a Select, Radio, or Checkbox Group to offer predefined choices.
Copy and paste your first option for easy placement of subsequent options.
- Drag the necessary fields from the Fields section on the right, and drop them onto the doc on the left (outlined below).
- Add Additional Signers & Place Their
Fields
- Use the Signers dropdown to add each signer role, one at a time.
- Place only the fields that apply to the selected signer.
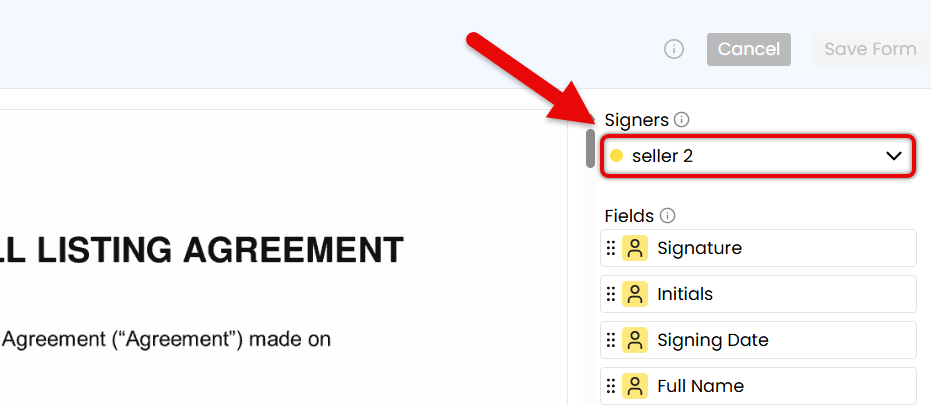
Fields are color-coded to match each signer, making it easy to see which fields belong to the signer currently selected in the dropdown.
- Save the Form
- Once the form is finalized, click [Save Form]. Your team can now use the form as a consistent starting point for signature requests.


Edit a Form to update signers, fields, or content, so your team always sends the most accurate, up-to-date version.
Who Can Do This: Master admins whose company is subscribed to Pipeline eSign.
To make changes to a form:
- Go to Your Reference Library
- Click [Reference] from the top menu.
- Choose a Doc to Edit
- Find the form you want to make changes to.
- Click the gear next to it, then select [Edit Form].
- Update & Save the Form
- Make your desired updates to the form.
- Click [Save Form].
Reset a Form to clear signers and fields, restoring it to the original doc for a fresh start.
Who Can Do This: Master admins whose company is subscribed to Pipeline eSign.
To reset a form:
- Go to Your Reference Library
- Click [Reference] from the top menu.
- Choose the Doc to Reset
- Find the form you want to clear and reset.
- Click the gear next to it, then select [Reset to Doc].
- Confirm Reset
- Click [Clear] to confirm you want to reset the form back to the original doc.
Learn how to Send eSign Requests