SUMMARY
Learn how Autofill Tags within Message Templates allow Pipeline to do the typing for you. When you use Autofill Tags within Message Templates to send a note or email, information from the transaction will be added to your message automatically.
Introduction
Sending messages from Pipeline is the most effective way of communicating with your team and contacts about a transaction. Pipeline's Message Templates allow you to make the process of sending messages, especially frequently sent or long messages, a breeze. And using Autofill Tags within those templates super charges them, allowing the system to automatically pre-fill specific, personalized transaction information into the message and saving you time over and over again.
Who Can Do This?
All Pipeline users can use Autofill Tags in Message Templates.
How To
Use Autofill Tags
To use Autofill Tags in a Message Template:
- Create a new Message Template or edit an existing one. Learn how to Create & Manage Message Templates →
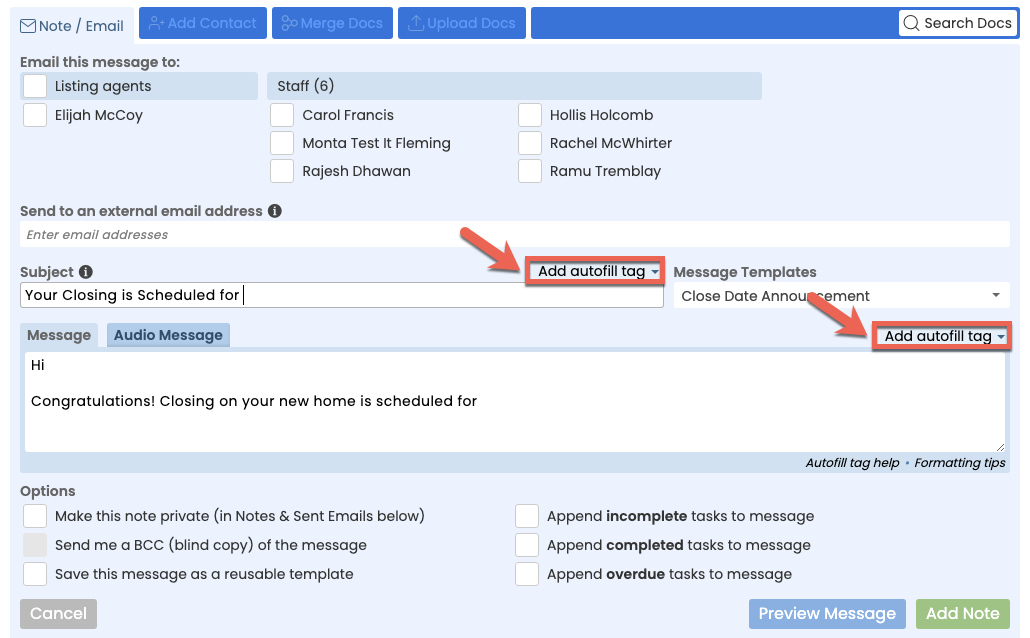
- When entering the Subject or Body of your message, place your cursor where you want to enter the Autofill Tag.
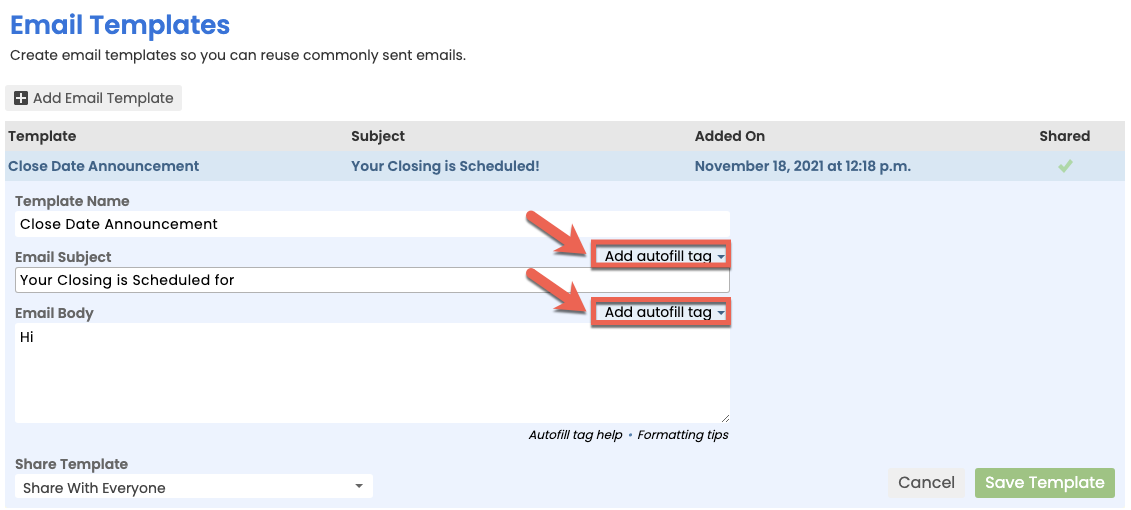
- To the right of the Subject or Body, select [Add autofill] tag.
On a transaction
From the Message Templates area
- Scroll through the list of Autofill Tags, or start typing your desired transaction field to refine the list of options.
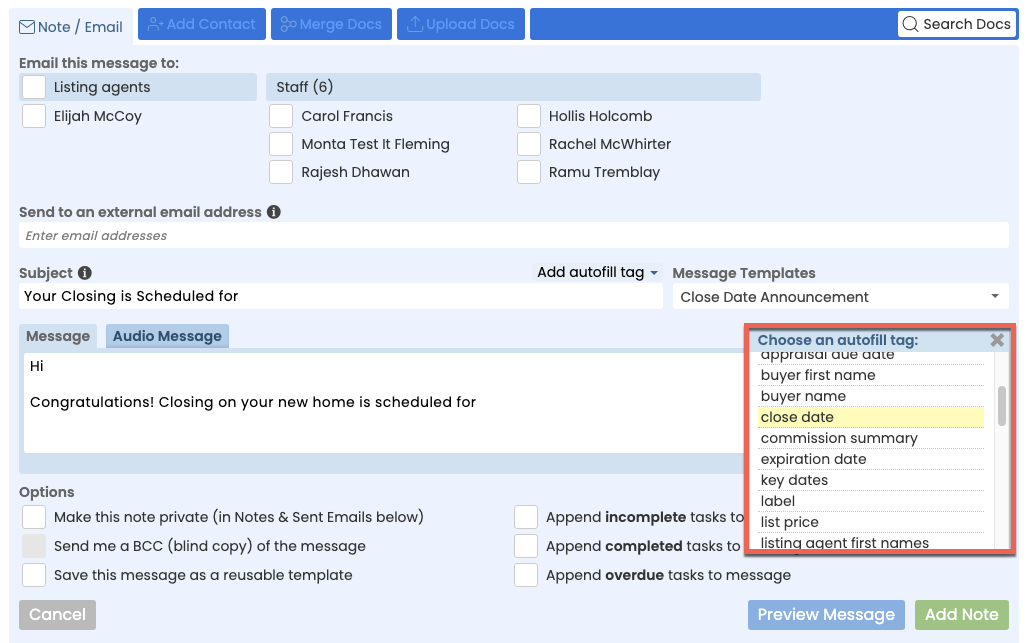 Find Autofill Tags fast by typing any part of the Autofill Tag name while the list is displayed.
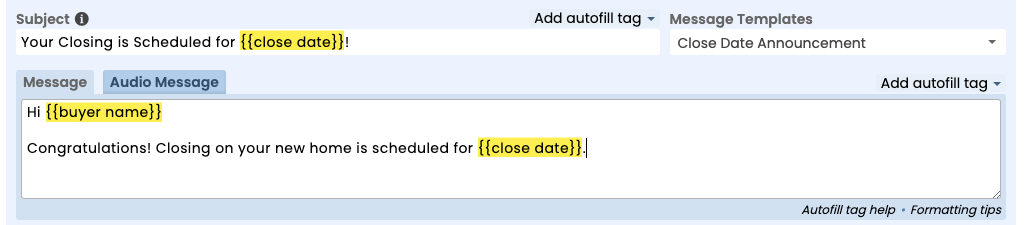
 - Select your desired Autofill Tag to insert a placeholder for the transaction field into your message.
- When your message template is complete, click [Save Template].


Use Advanced Autofill Tags
Advanced Autofill Tags are additional Autofill Tags that do not appear in the Autofill Tags drop down menu because they contain custom information from your account. These advanced tags allow you to automatically insert specified contact information, checklists, and task due dates.
To insert Advanced Autofill Tags in a Message Template:
- Create a new message template or edit an existing one. Learn how to Create & Manage Message Templates →
- When entering the Subject or Body of your message, type or paste your desired tag from the list of either Advanced Contact Autofill Tags or Advanced Checklist Autofill Tags to insert it into your message.
For example, to autofill a contact's phone number, use the tag,
{{contacts:ROLE:phone}}.
- Inside the tag, the capitalized word specifies the custom information you'll enter. Replace the capitalized word with the corresponding details from your account:
• Replace "ROLE" with the role of the Contact whose information you wish to autofill in the message. For example, to autofill an Attorney contacts phone number, use the tag,{{contacts:Attorney:phone}}.
• Replace "NAME OF CHECKLIST" with the Checklist Title. For example, to autofill your entire CLOSING TIMELINE checklist, use the tag,{{checklist:CLOSING TIMELINE}}.
• Replace "TASK NAME" with the Checklist Task. For example, to autofill the due date for your "Listing Agreement" task on the checklist titled, "Listing checklist," use the tag,{{checklist:Listing Checklist:Listing Agreement:due date}}.

Seller's Disclosure (main)", when you create the Advanced Autofill Tag for that field, name it "Sellers Disclosure main".Advanced Contact Autofill Tags
TAG | FIELD | EXAMPLE TO ENTER | RESULT |
|---|---|---|---|
| {{contacts:ROLE:company}} | Company | {{contacts:escrow:company}} | ABC Title |
| {{contacts:ROLE:fax}} | Fax | {{contacts:escrow:fax}} | 310-555-1212 |
| {{contacts:ROLE:role}} | Role | {{contacts:escrow:role}} | Escrow |
| {{contacts:ROLE:first name}} | First Name | {{contacts:escrow:first name}} | Charles |
| {{contacts:ROLE:name}} | Name | {{contacts:escrow:name}} | Charles Ghould |
| {{contacts:ROLE:email}} | Email | {{contacts:escrow:email}} | charles@abctitle.com |
| {{contacts:ROLE:phone}} | Phone | {{contacts:escrow:phone}} | 310-555-1263 |
| {{contacts:ROLE:transaction note}} | Transaction Note | {{contacts:escrow:transaction note}} | Out of office on Tuesdays |
Advanced Checklist Autofill Tag
TAG | FIELD | EXAMPLE TO ENTER | RESULT |
|---|---|---|---|
| {{checklist:NAME OF CHECKLIST}} | Entire checklist | {{checklist:Required Listing Documents Residential}} | **Required Listing Documents Residential** [ ] Mold Discl. [ ] HOA [ ] Seller's Property Disclosure [ ] Notice to Prospective Buyer *(Due: Due 1 day after Acceptance)* [✓] Lead based paint (if applicable) *(checked by Jim Smith on Mar 16, 2020)* |
| {{checklist:NAME OF CHECKLIST:TASK NAME:due date}} | Due Date | {{checklist:Pending checklist:Purchase and sales agreement:due date}} | Mon, Mar 16, 2020 |
Pipeline Pro Webinar Recording - Autofill Tags 🎥
Learn how let the system do your typing when sending notes. We'll cover how and when to set up Autofill Tags in your Message Templates so they'll be replaced with the appropriate value from the transaction whenever you use the template to send a note. We'll also go over the Advanced Autofill Tags feature.
View more Pipeline Pro Webinars here →
11:37
Pipeline Pro Webinar Recording - Advanced Checklist & Contact Autofill Tags 🎥
Since there were a number of questions related to the checklist Autofill Tag portion of last week's webinar, this week we'll dive deeper into how to utilize those Autofill Tags in messages.
View more Pipeline Pro Webinars here →